I’ve spent the past two days bring Christmas into my ACM booth space. My goal was to have my space madeover by November 1st . . . better late than never!
I decided to go with a blue and red color theme for my space this year, so I’ve been paint a lot of things blue lately in preparation.
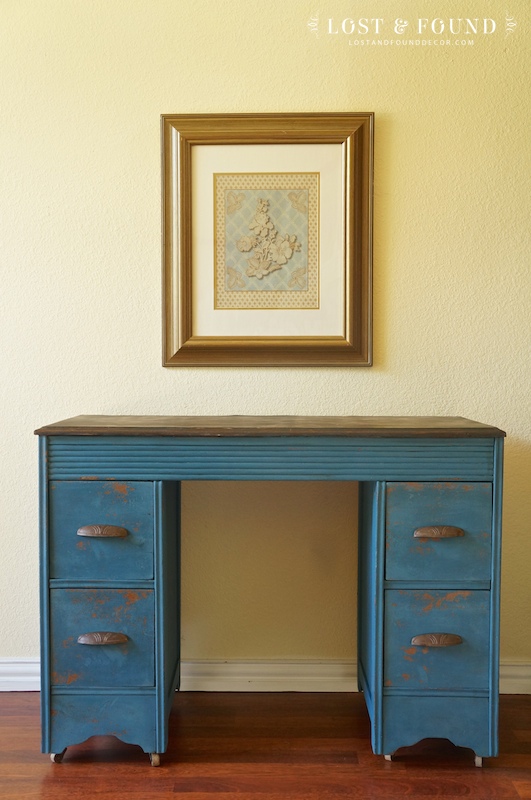
Like this Flow Blue Milk Paint desk,
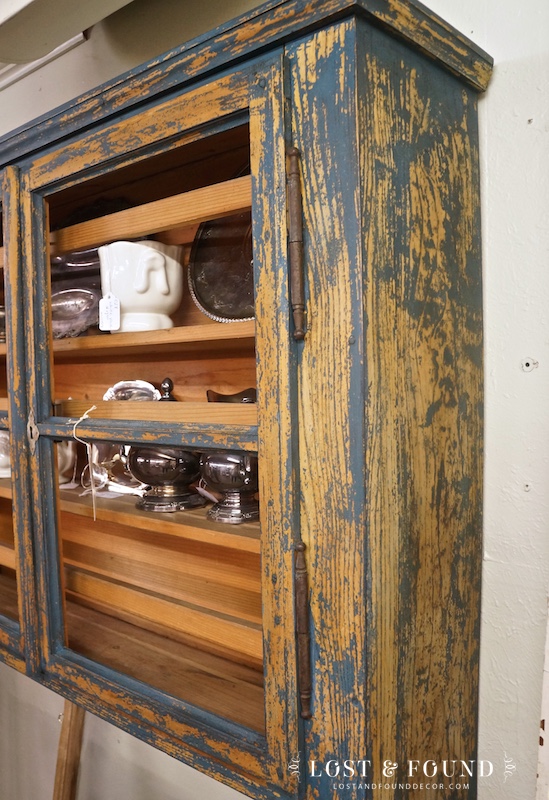
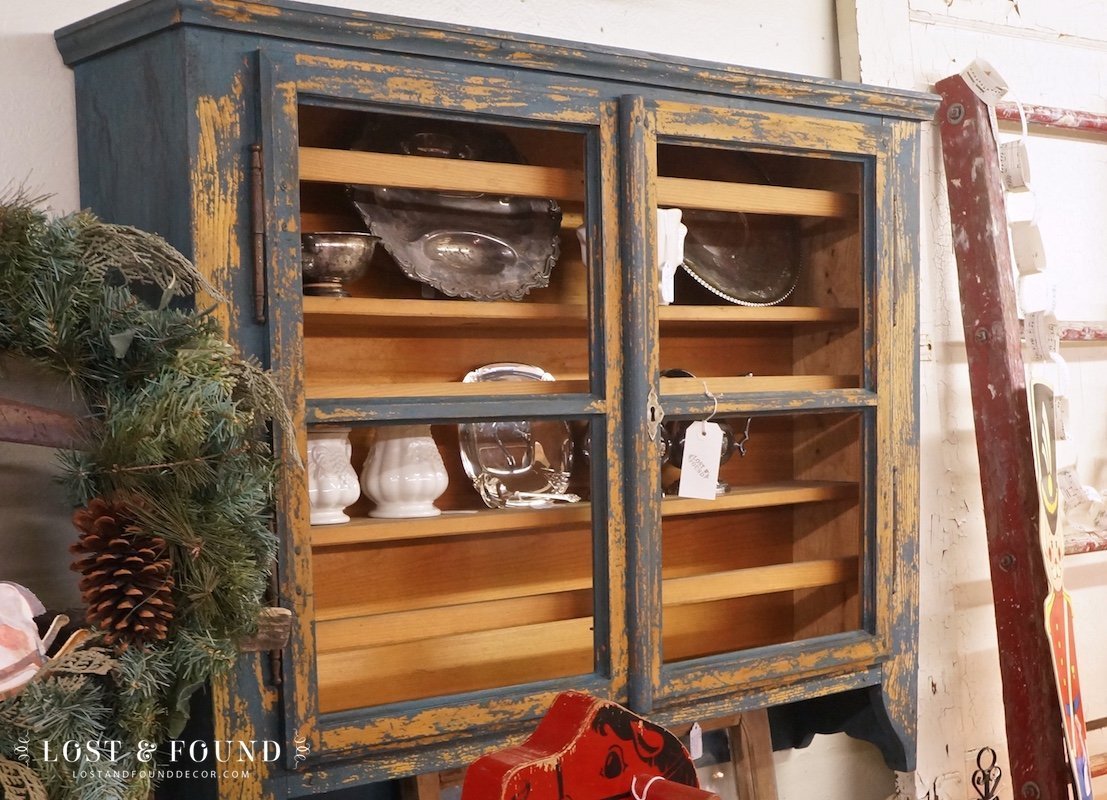
My last blue paint project was this cabinet hutch that I found at Antique Alley earlier this fall.
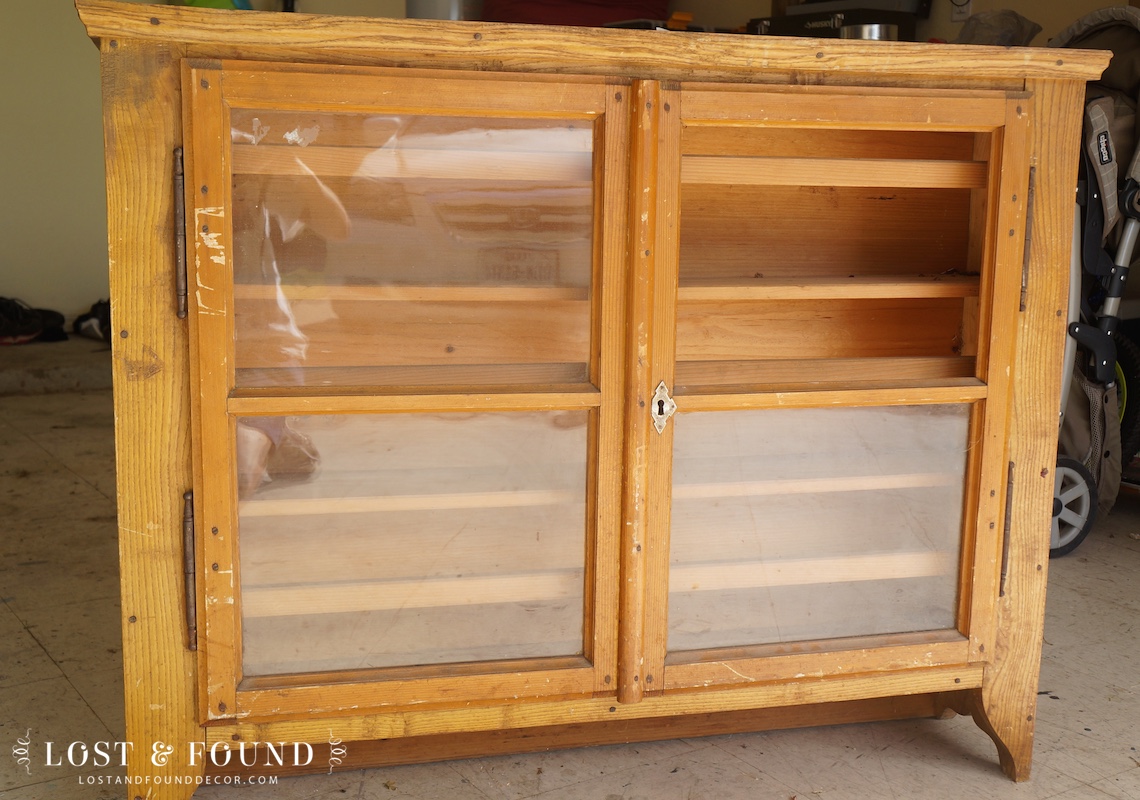
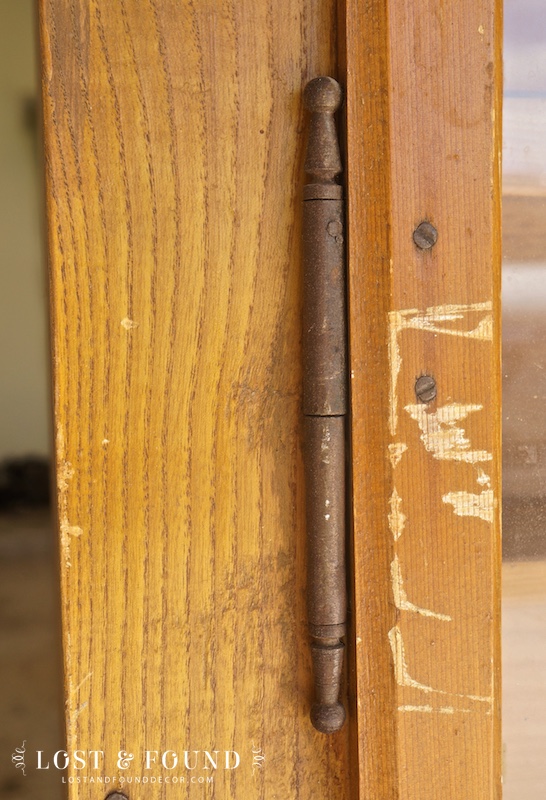
I’m not really sure of its age, but it has some fantastic details that help give it a primitive look, like the rough cut nails and brass hinges.
It was missing a pane of glass, but that’s not a big problem. Rather than replace it, I decided to just remove all of the glass and leave the doors open.
After hunting around for some inspiration, I found a recent post by Miss Mustard Seed where she created a fantastic primitive look on an old cabinet using two layers of blue milk paint. I already had the two colors she used on hand, so I decided to try the same technique out on this hutch.
I won’t steal her tutorial post, so if you want to read more about the step by step process please click the link above to head to her site. I will walk you through though what my cabinet looked like along the way.
I started out with one coat MMS Milk paint in Artissimo, which is a fantastic, deep blue color.
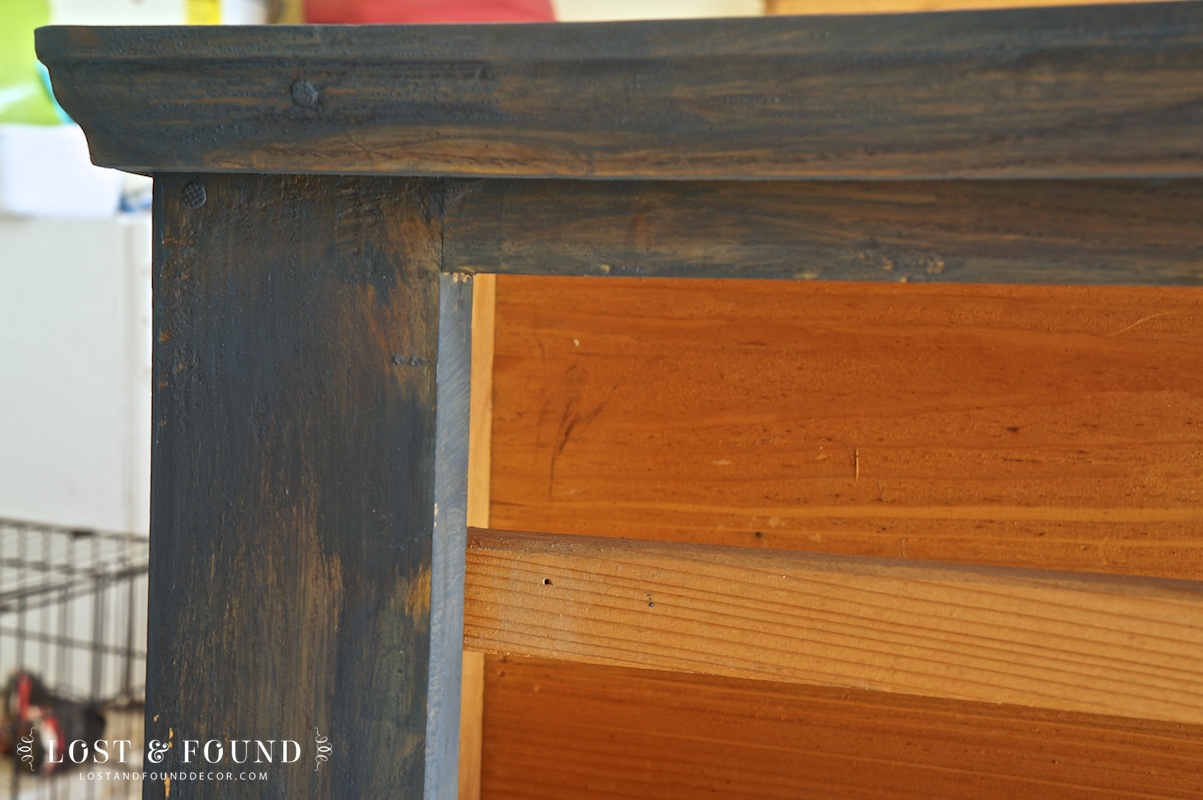
I did not apply any bondage agent or do any sanding, but the paint stuck well and didn’t really chip anywhere.
Next in the process was to rub the entire cabinet hutch down with candle wax. I used a regular old candle I had on hand, and it worked just fine. The layer of wax causes places where the next coat of paint will resist sticking, and helps create that great, layered old-age paint look.
After the candle wax, one layer of MMS Flow Blue Milk paint went on, and then I started to see some chipping.
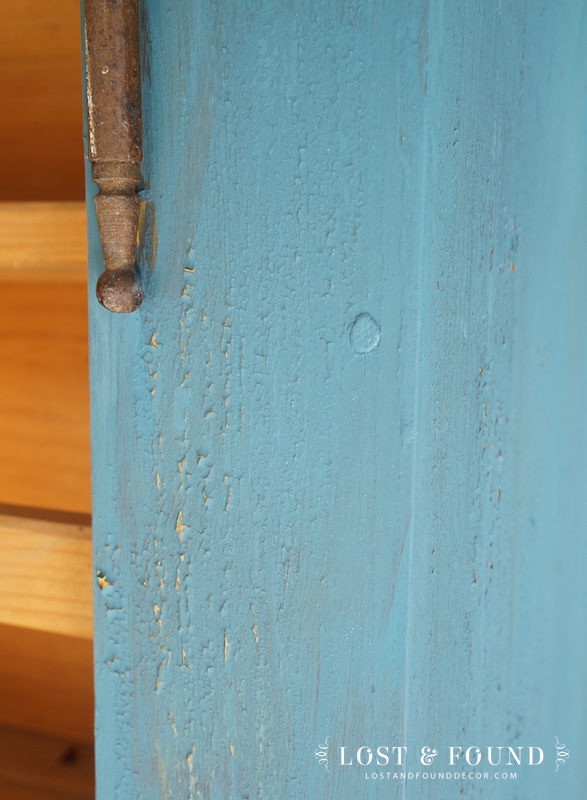
So, this piece is a great example of the unpredictability of milk paint! For whatever reason, even though my first layer of paint didn’t chip at all, my second layer of paint chipped a lot. And not just the top blue layer that was resisting the wax, but both blue layers. I honestly have no idea why, but I decided to go with it.
I scraped off all the chipping paint, then wiped it down with a damp cloth to get the dust off (which caused even more paint to chip!). A little sanding with some fine grit sandpaper was needed in a few spots, but mostly the milk paint distressed itself. I did choose to finish it with dark antiquing wax because I think it helped bring out the texture in the paint by settling in all of those cracks.
Here is the final product:

See what I mean by a lot of chipping?
This one entire side almost completely chipped off! Strangely enough though, the other side didn’t chip at all. Hmm. Oh well, just go with it, remember?
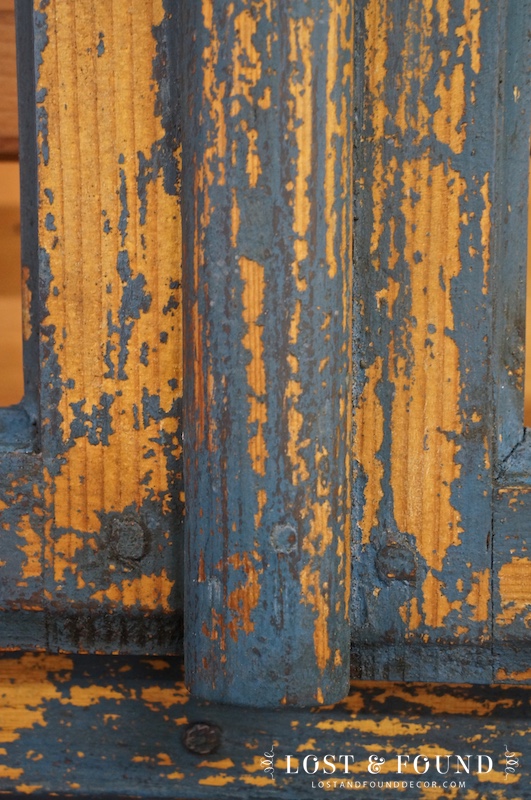
Check out that amazing texture though! You can see little hints of the darker Artissimo color underneath the lighter Flow Blue. Creating a look like this is where milk paint really shines–chalk paint could never do this.
The hutch is now one of the main focal points of my booth Christmas display. I love how it turned out and love how it looks in my space too! I will be posting soon more pictures of my Christmas booth in general, but I wanted to share the specific makeover of this cabinet first.
What do you think–too chippy? Or just right?

Tone
Wednesday 12th of November 2014
I love the chipping juat as it is! Thats whats so great with MP, its totally unpredictable! But youre cupboard is just lovely. Bold choice of color as well:) I have an old cupboars after my mother inlaw haning in my kitchen. It has been sandes down to the raw wood, leaving some traces of oooold color and stain. I love how it looks now, but I cant get my mind over ttrying MP on it. I uses it for the first time on a stunning antique sidenboars just recently, and I loved the look:) check it out therehttp://frugalfurbishing.blogspot.no/2014/11/and-there-it-is-in-all-its-glory.html?m=0
Thanks for a great post!
Betsy
Wednesday 12th of November 2014
I think it's perfect just the way it is What a fabulous piece!! Thank you so much for sharing at our Vintage Inspiration Party.
Diane | An Extraordinary Day
Tuesday 11th of November 2014
Melanie...I don't know that I could live with that in my house...but I do love it and am amazed with your work.
Thanks for sharing your project with us at Project Inspire{d}!!
Melanie
Wednesday 12th of November 2014
Thank you Diane, and I completely understand. The crazy chipping look isn't for everybody!
susan
Tuesday 11th of November 2014
Are you kidding? That cabinet is flipping gorgeous!!! LOVE. (found you through Coastal Charm).
Melanie
Wednesday 12th of November 2014
Haha, thank you Susan. I appreciate you stopping by.
Shelley
Thursday 6th of November 2014
1. Love your blog. 2. Agree with Jill, weirdly I thought the same thing only by the heater. 3. I think the huge amount of chipping is lovely. I've been wanting to paint something and have it chip a lot but I've been worried that I wouldn't like it if it wasn't even, or chipped too much, or basically didn't turn out like what I imagined...your photos and words are helping me inch closer to just going for it.
Melanie
Wednesday 12th of November 2014
1. Thanks so much Shelley. 2. I think Jill is onto something too. 3. The great thing about milk painting is that if it chips too much, you can always scrape it off, sand a little, and try again. I have done that with a few pieces that chipped more than I wanted and it worked out fine. The super-chippy is fun though, if you can go with it!