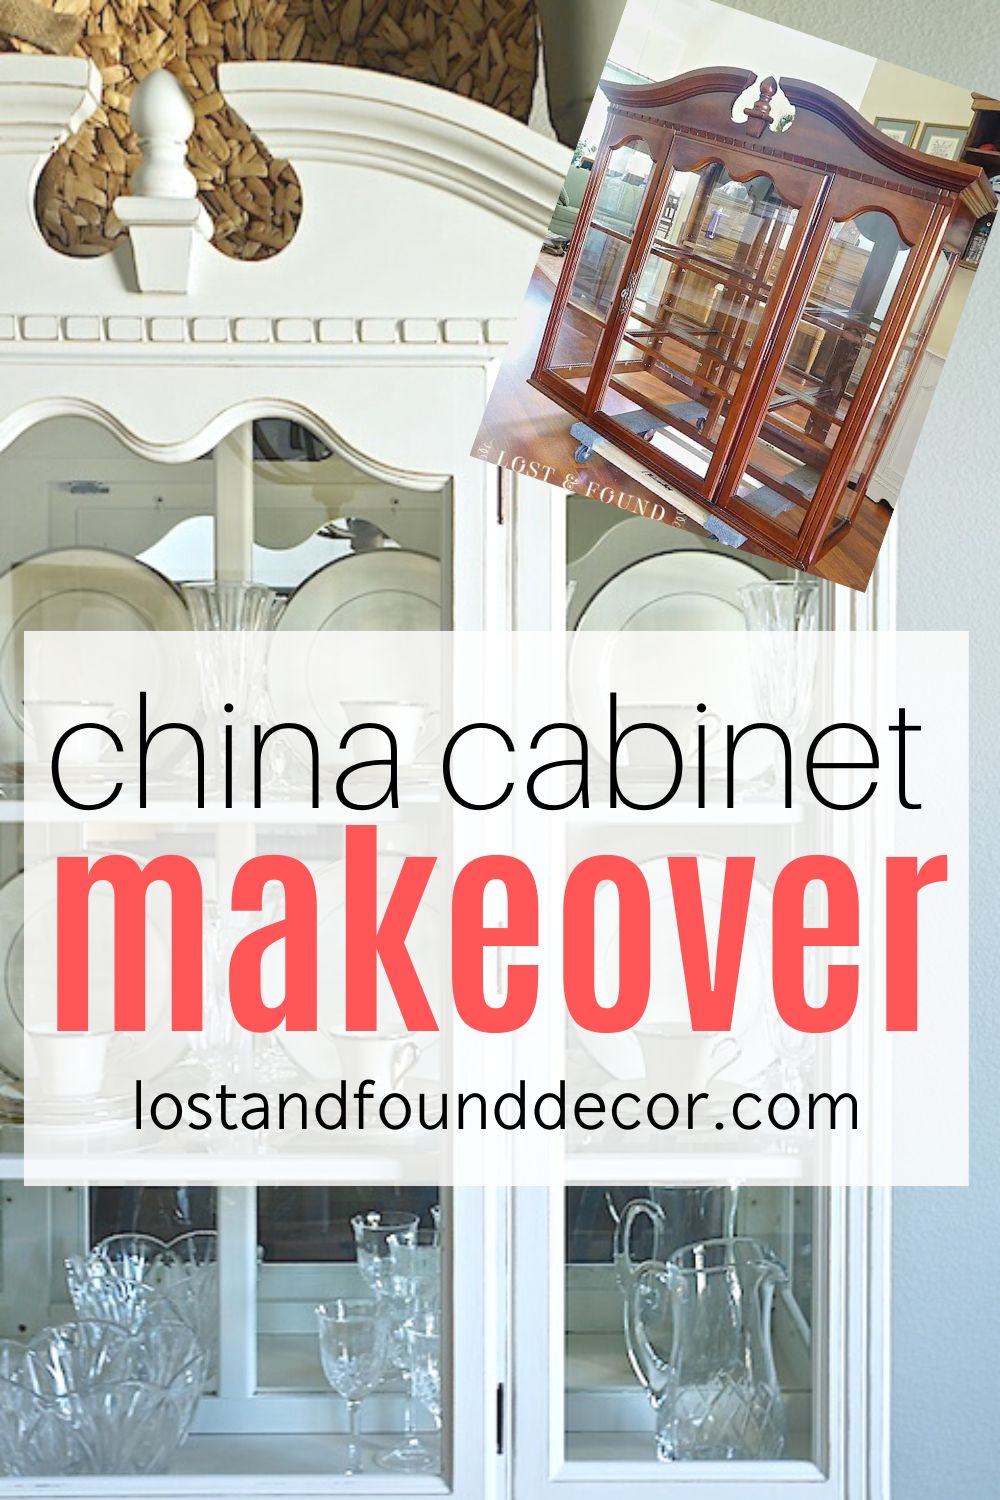
Today I am sharing a painted china cabinet makeover you don’t wanna miss!
So many of us have these large cabinets in our homes, and we are ready to give them a new life.
China cabinets are quite functional for storage, but in many modern decor schemes, their dark wood tones are often too heavy for the space.
Don’t worry though! Instead of rushing out to spend money on new furniture, I’m going to show you how you can do your own diy china cabinet makeover!
The easiest way to update a china cabinet is with paint. For about $100 (or less) in materials, you can create the look you want on your own piece of furniture.
You will be amazed at how a different color can totally transform the look of the china cabinet.
Follow along to see my complete guide on how to paint your china cabinet.
DARK AND DATED CHINA CABINET MAKEOVER
Recently I started work on making over this large china cabinet as a custom piece for a local client.
It’s a big project, so I took apart the top and bottom and worked on them as separate pieces.
That obviously is the base . . .

and here is the top.
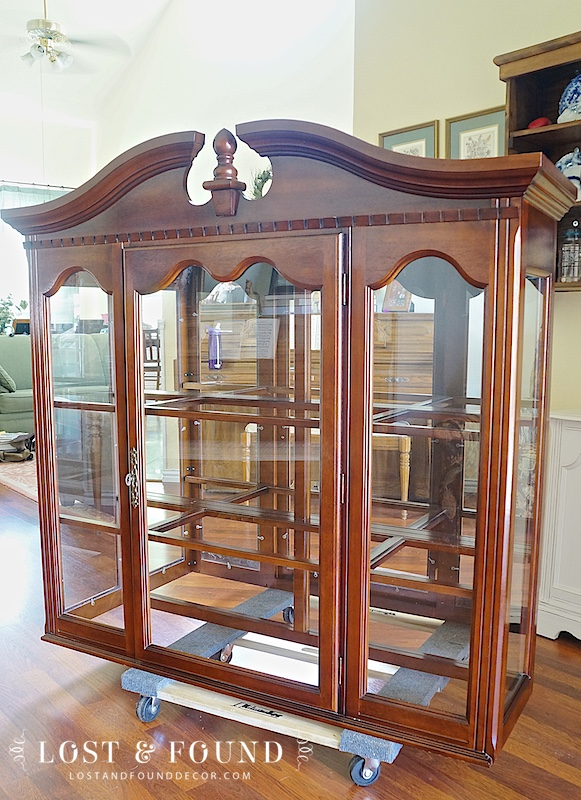
The client was looking to create a cottage or farmhouse-style feel in her dining room.
She wanted the cabinet painted a distressed, white– not a bright white, but more of warm-toned, off white.
I knew just the right white paint color for her! We’ll get to that in a minute though 🙂
This post contains links to websites outside of LostandFoundDecor.com. These links are provided for your shopping convenience. It does not cost you any more to shop through these links, but we will earn a small commission.
SUPPLIES NEEDED TO REFURBISH A CHINA CABINET
It’s always a good idea to gather all the materials you will need before you start your project so you can work quickly and efficiently.
Some of these supplies you may have already around in your home. If you don’t though, I have included shopping links to help you find the materials you may still need.
- Degreasing Cleaner (I use this one!)
- Mid-grit sandpaper or sanding pad
- Screwdriver
- Painter’s Tape (this is my favorite brand)
- White Paint for Furniture
- Primer (sometimes!)
- Good Quality Paint Brush or Roller (here is my favorite brush and favorite rollers)
STEPS FOR YOUR PAINTED CHINA CABINET MAKEOVER
1. Remove the Hardware
A tip I have shared before, but it’s worth saying again . . . take a few minutes and label your hardware as you take it off a piece.
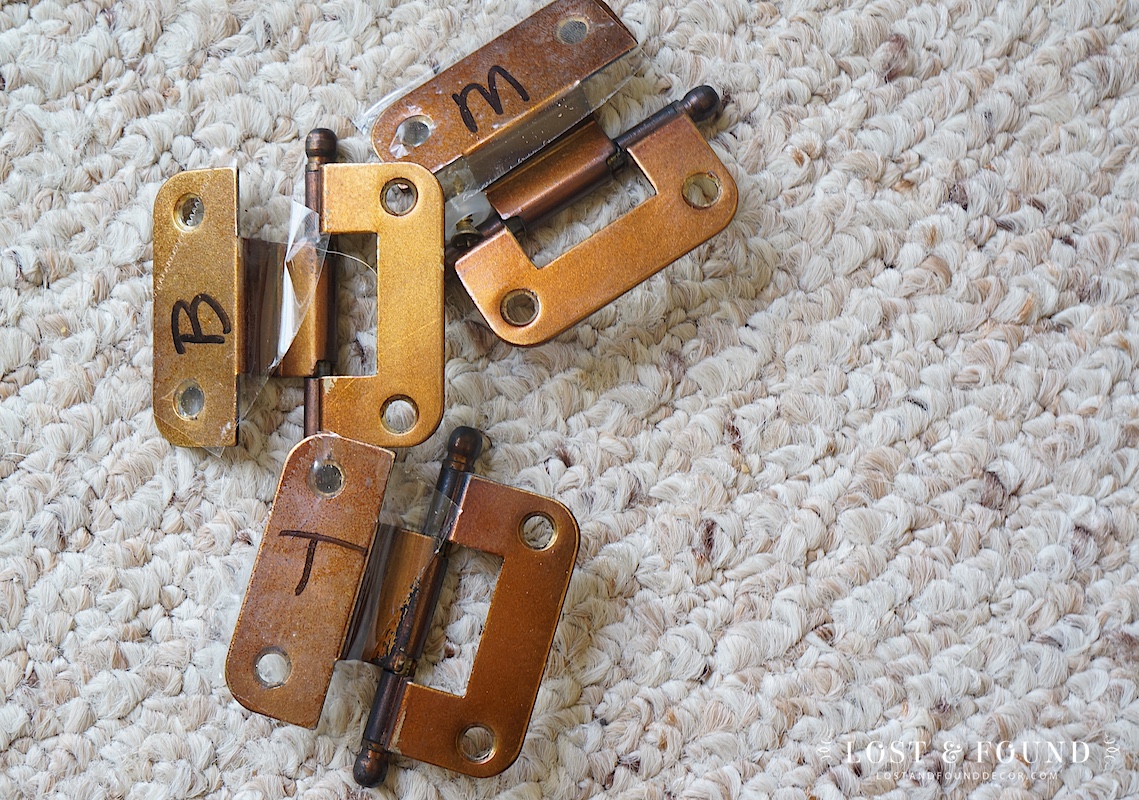
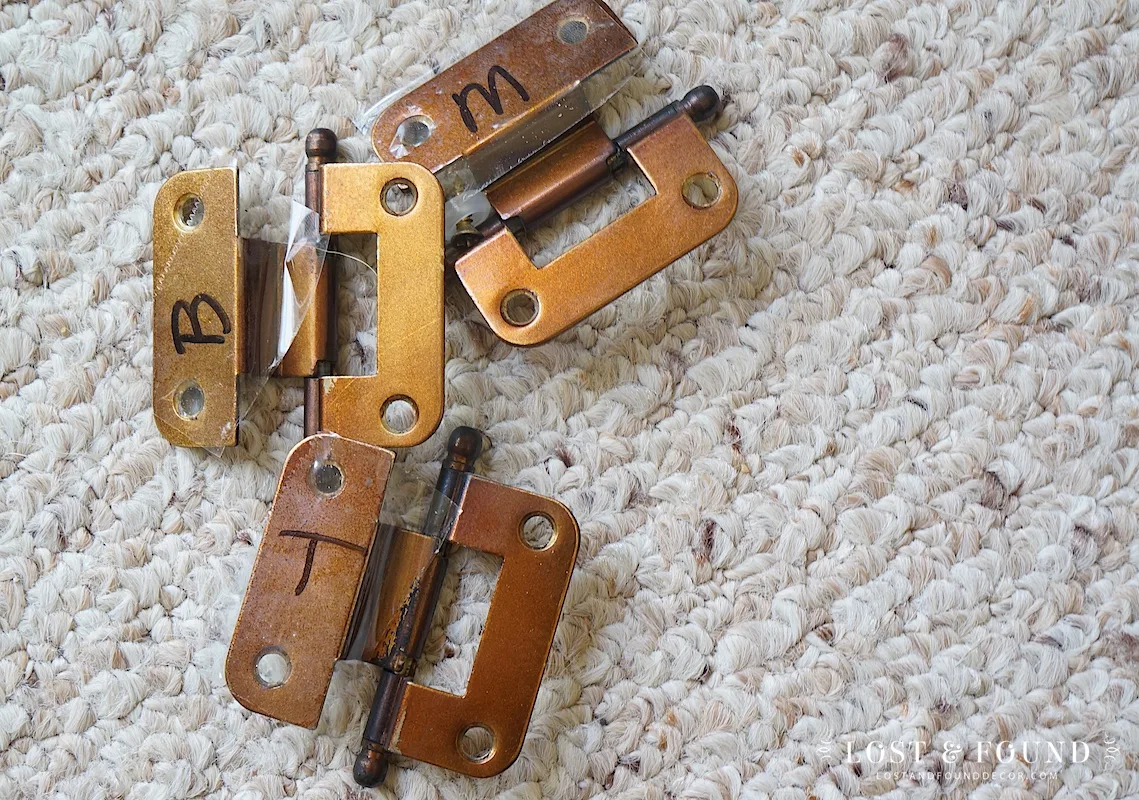
I’ve learned the hard way that old hardware has a way of getting a little finicky and usually wants to go back into the same holes!
So labeling your pieces will save you the headache of screwing and unscrewing hinges and pulls over and over again until you find the right one.
Also be sure to store them all in a safe space while you’re painting. A plastic bag or tub works great for this.
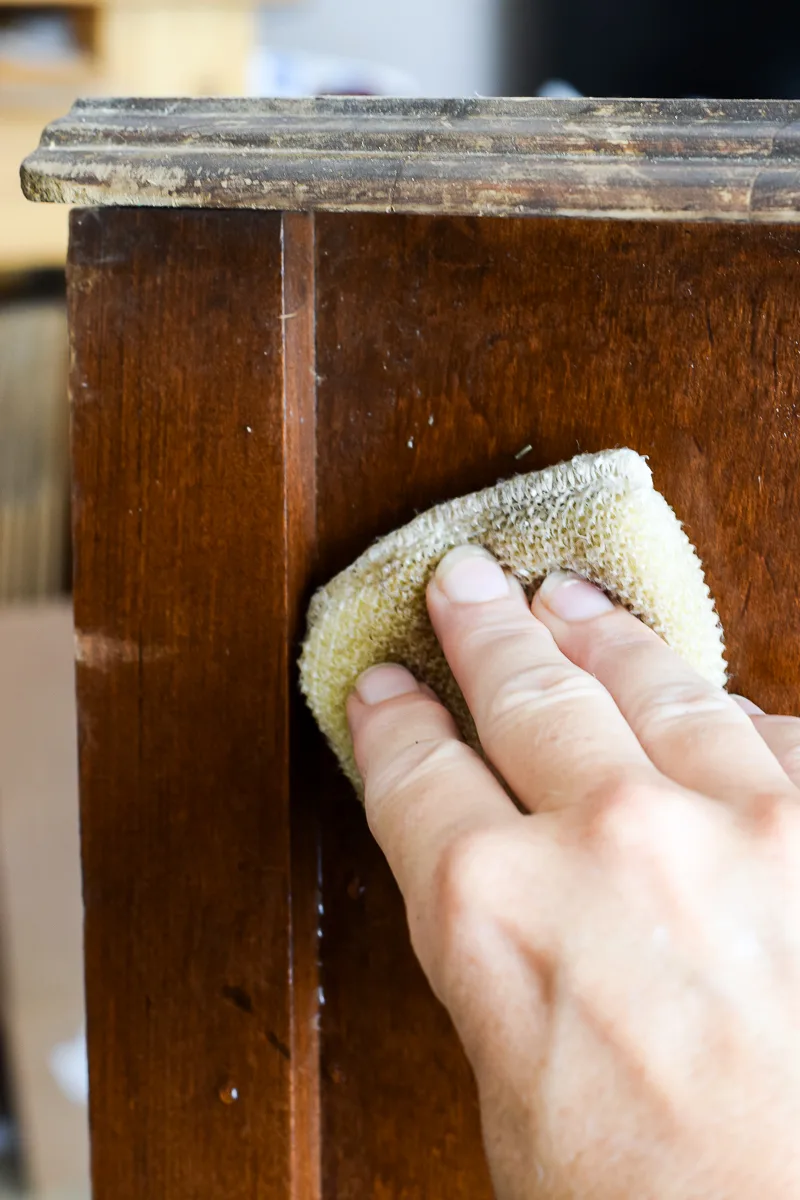
2. Clean with Degreaser
Once your china cabinet is all disassembled, the next step is to clean it well.
I use Fusion’s TSP Alternative to get all grease and grime off the furniture so my paint will adhere well.

RELATED POST: HOW TO CLEAN YOUR FURNITURE BEFORE YOU PAINT IT
3. Tape Off Glass or Mirrors
Use painter’s tape to tape off any glass doors or mirrors on your cabinet so they stay clean of paint.
You may be tempted to skip this step! But it will save you a ton of time cleaning up your project and will make your painting faster as well.
4. Scuff Sand the Surface of the Cabinet
This particular piece still had a pretty glossy finish.
It needed a quick sanding, just to help open up the surface of the finish.
RELATED POST: HOW AND WHEN YOU SAND FURNITURE BEFORE FOR GOOD PREP
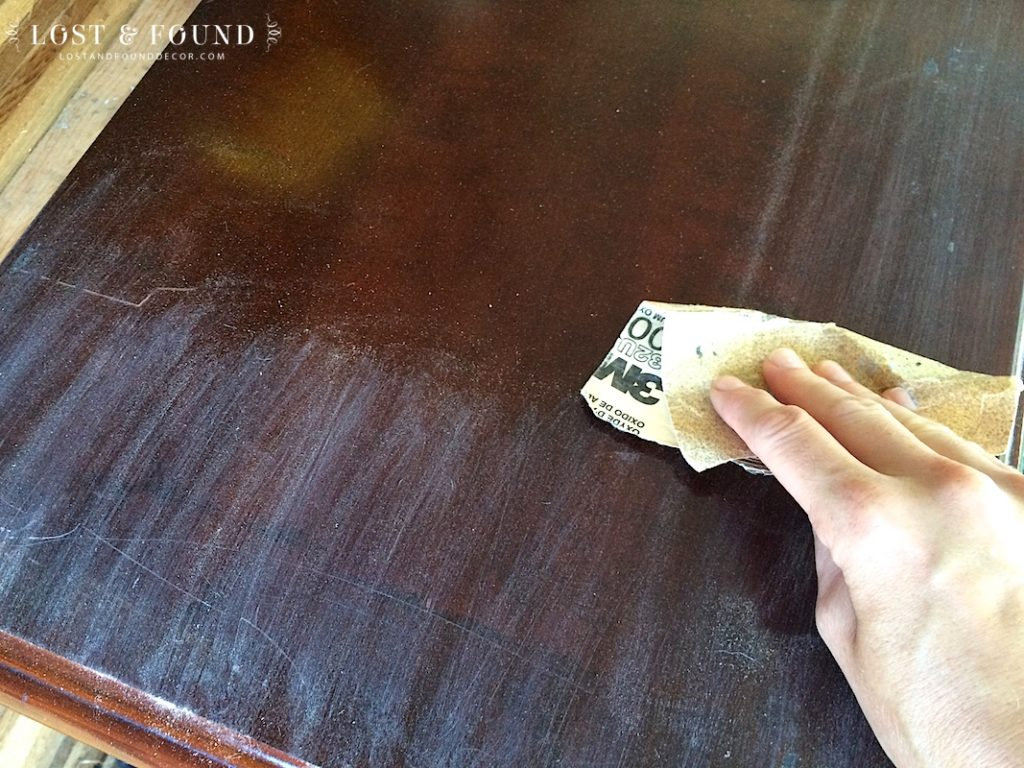
And when I say quick sanding, I really do mean quick.
This part doesn’t have to take a lot of time! You aren’t trying to sand the finish completely off, just enough to open up the pores of the finish.
I used 150-grit sandpaper and took literally 5 minutes to scratch up the surface of the entire cabinet, then wiped off the dust with a wet rag.
DO I NEED TO APPLY A PRIMER?
To prime or not to prime . . . that’s always the debate!
In general, I do not use a primer when I am painting a real wood piece of furniture with any of the paints I shared above. As long you clean your piece well and scuff sand the surface, a primer is generally not necessary to get your paint to stick.
One time you may need to use a primer is if you think your wood may bleed. This happens a lot with very old pieces that have all of their top coat worn off, especially red-toned furniture like cherry or mahogany.
Sometimes the water in the paint will pull the wood tannins through the paint, and you’ll get pink splotches on the surface. If you are afraid of that happening, you can apply a basecoat of a stain blocking primer to seal in the wood tannins.
You can also use a base coat of a white primer to help get the dark wood covered faster. It’s up to you!
5. Paint on your White Paint
With the prep done, I could start to paint! This is when it really gets fun 🙂
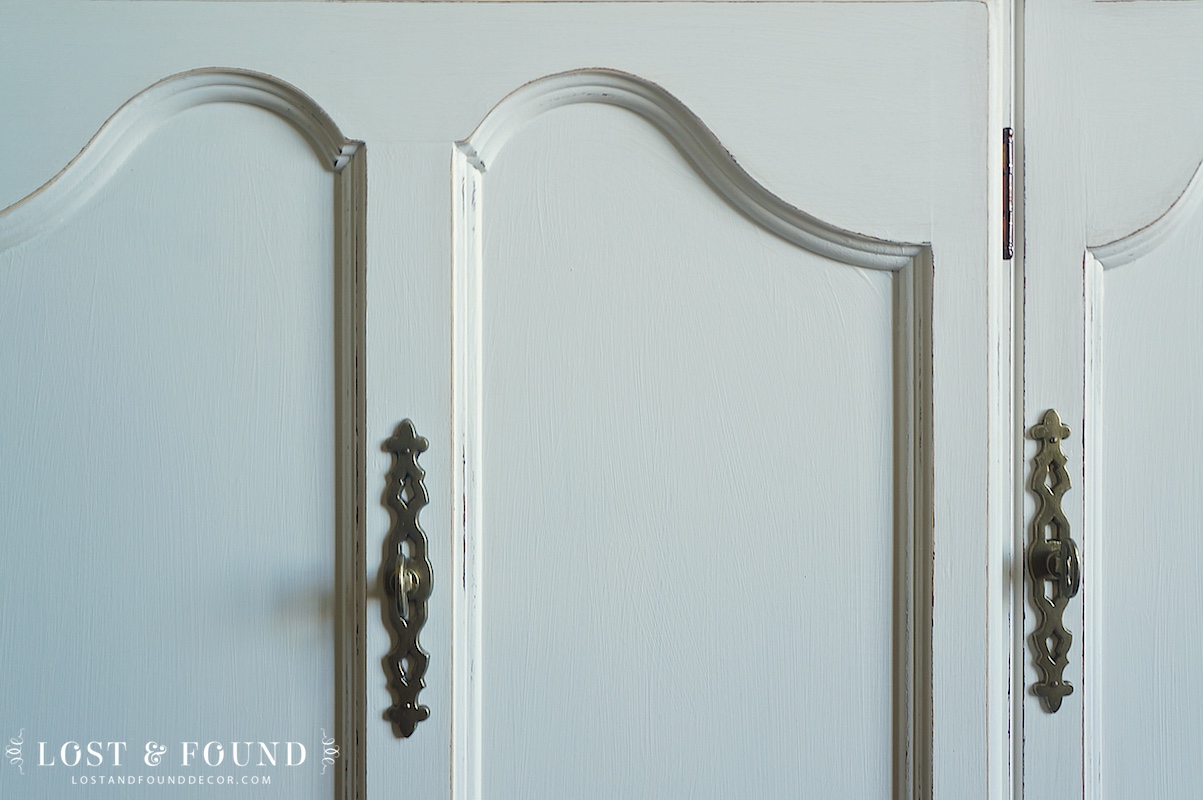
Fusion Mineral Paint in Champlain is the perfect, warm-toned off white, so that was my choice for this project.
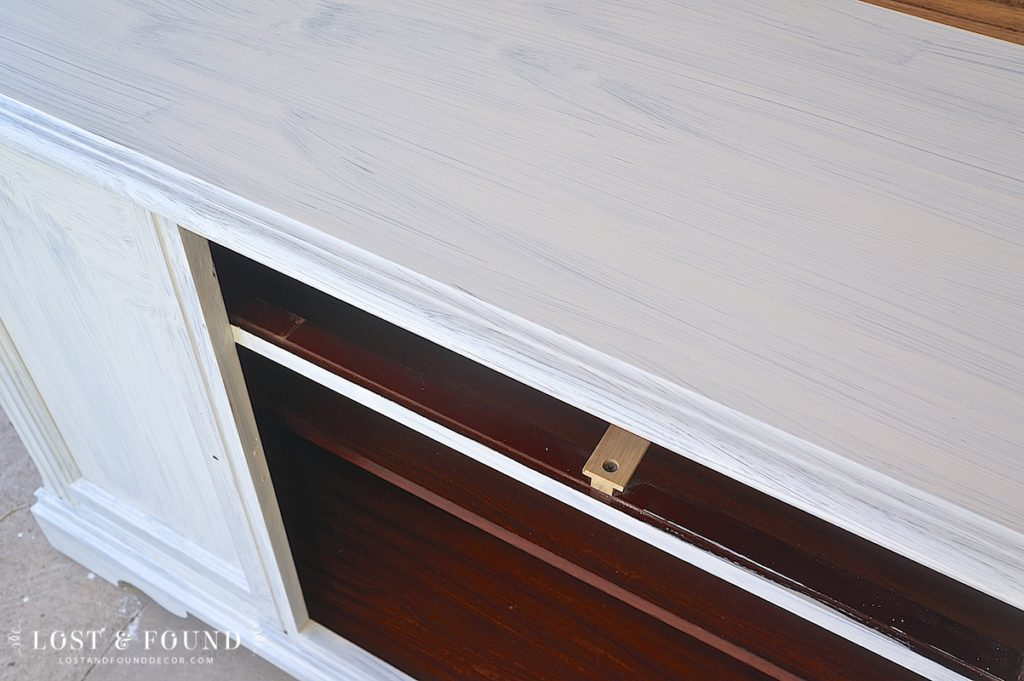
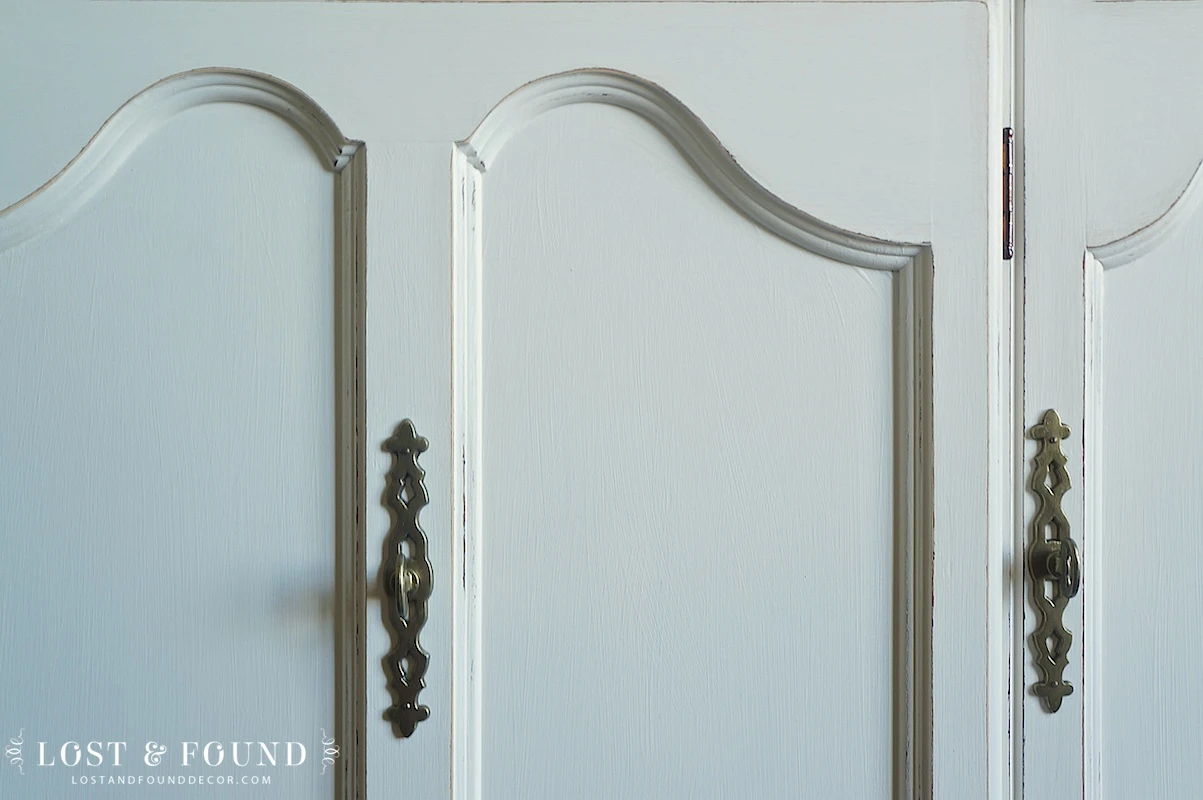
This is after the first coat of paint. I ended up needing three coats in order to get the full, matte coverage I wanted.
If this is your first time painting a dark wood white, be prepared you are going to likely need at least 3 coats of paint. That’s just how colors work. It takes a lot of white pigment to cover all of that dark, wood stain.
I allowed at least 2 hours of drying time in between each coat.

With the top of the cabinet, I had to make sure to paint every single surface. The back of the cabinet was a large mirror, so it would reflect the inside and underside of every piece of wood there.
When it was all said and done, I used two pints of Champlain to finish the whole cabinet.
That may seem like a lot, but $60 worth of product to completely transform a huge china cabinet? That’s not too bad.
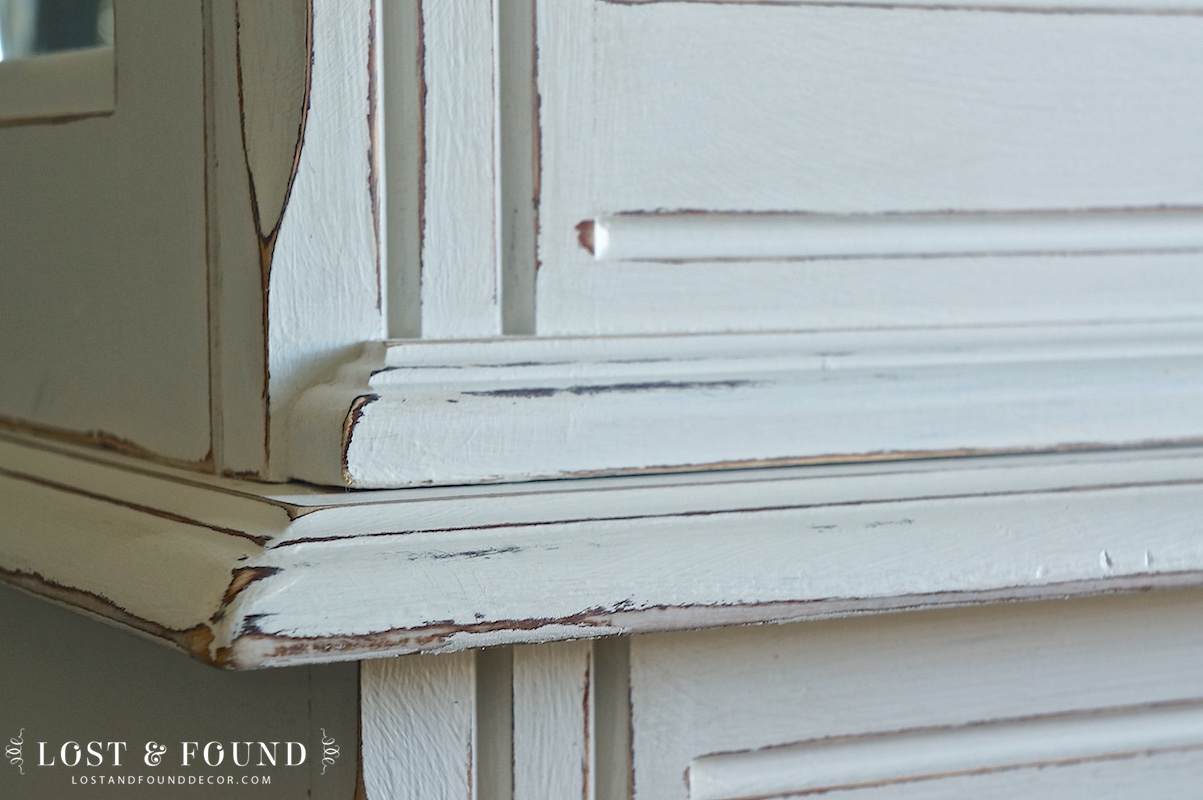
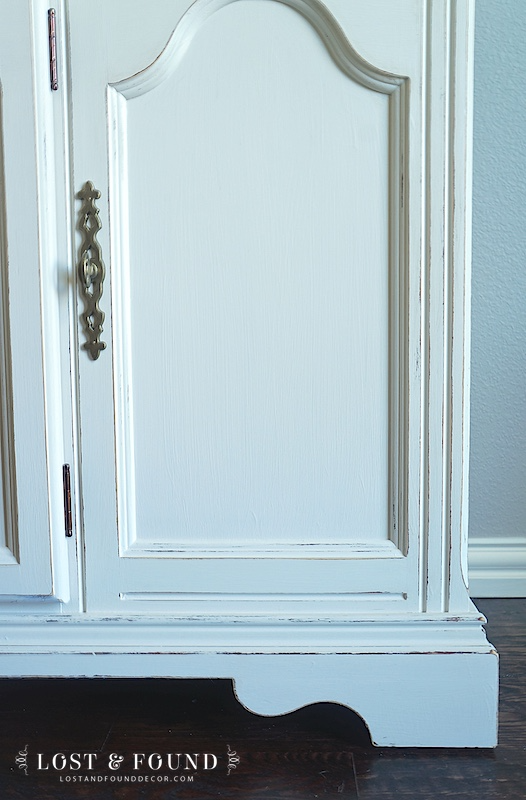
6. Distress the Edges & Finish Sand
Soon after the last coat was dry to the touch, I used more sandpaper to distress all of the edges of the cabinet. This is an optional step of course–you can skip this if you want a clean finish without distressing.
I also took 320 grit sandpaper and finish sanded the whole piece to make it smooth to the touch.

7. Apply Your Top Coat
Fusion Mineral Paint actually doesn’t require any extra topcoat to finish off or seal your paint. That’s an amazing feature!
But if you want to add one just for extra durability, you can use a clear furniture wax or a water-based polyacrylic if you like.
8. Freshen Up & Reattach Hardware
The client wanted to keep the original brass hardware on this cabinet but was hoping to spruce it up a bit.
After a good cleaning didn’t give me the shine I wanted, I used a little bit of metallic bronze paint to refresh the hardware.
This was a great way to save the old hardware and save money.

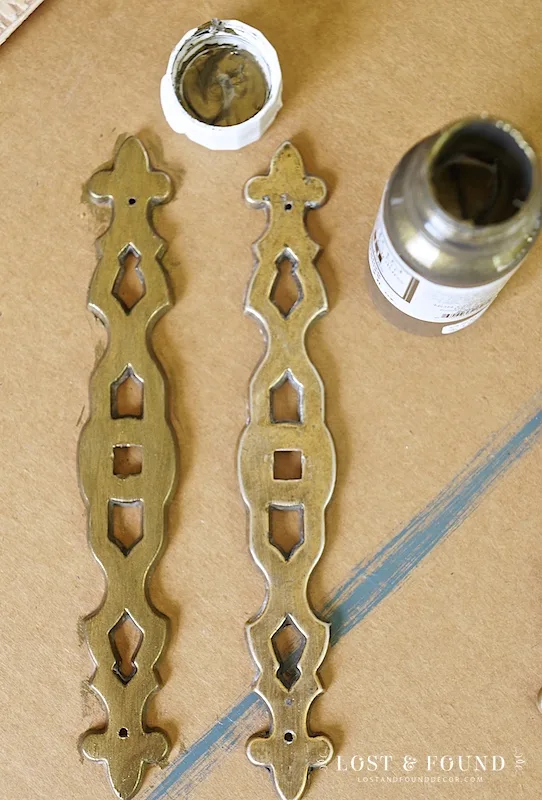
You can read the easy tutorial for that project here: Painting Furniture Hardware with Fusion Metallic Paint.
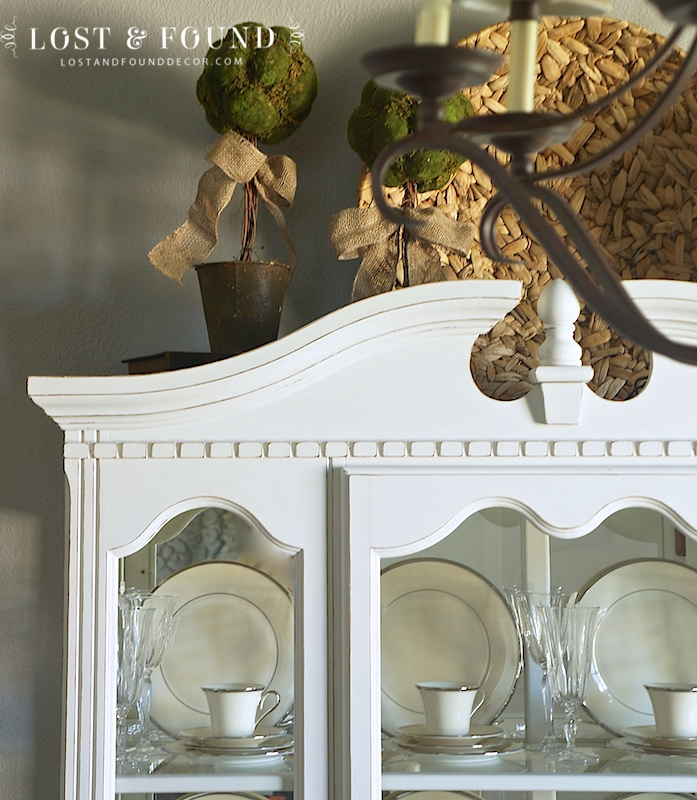
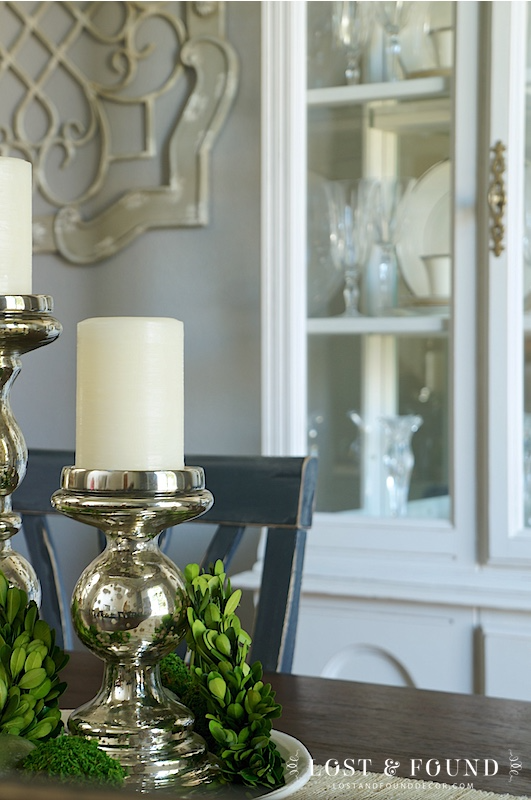
BEAUTIFUL FINISHED CHINA CABINET MAKEOVER
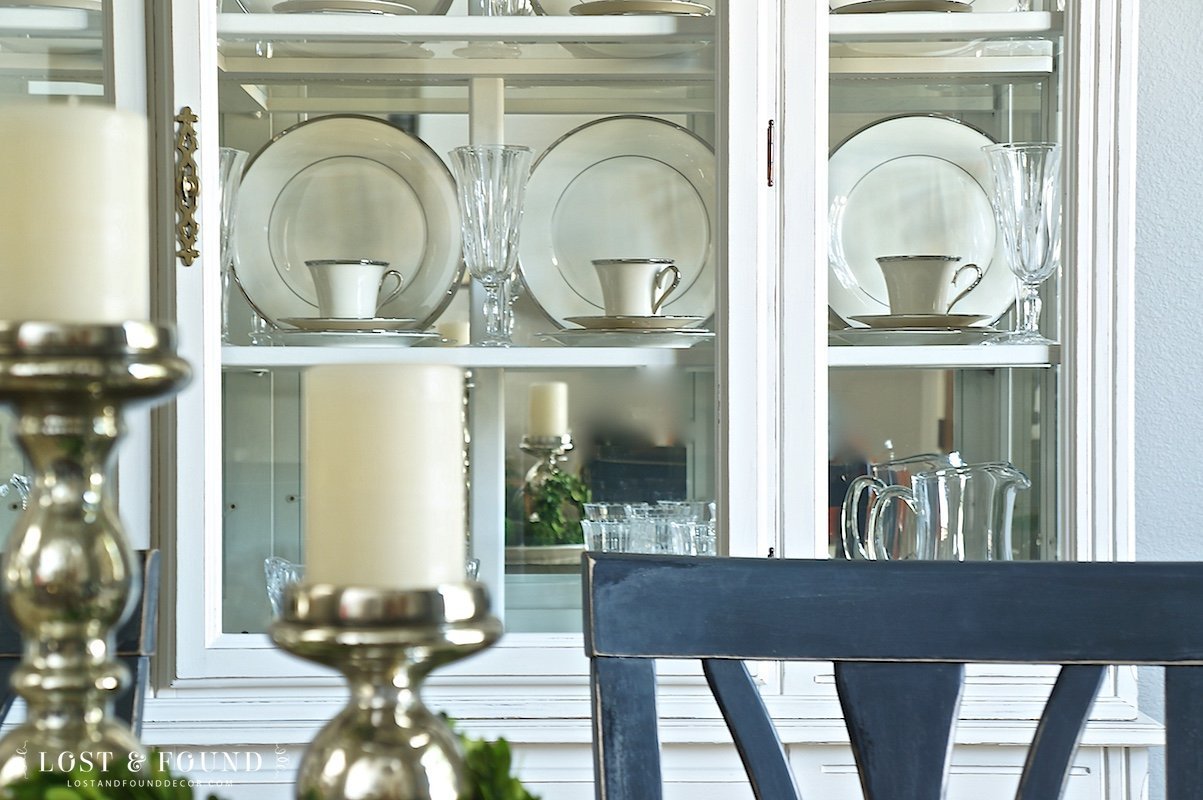
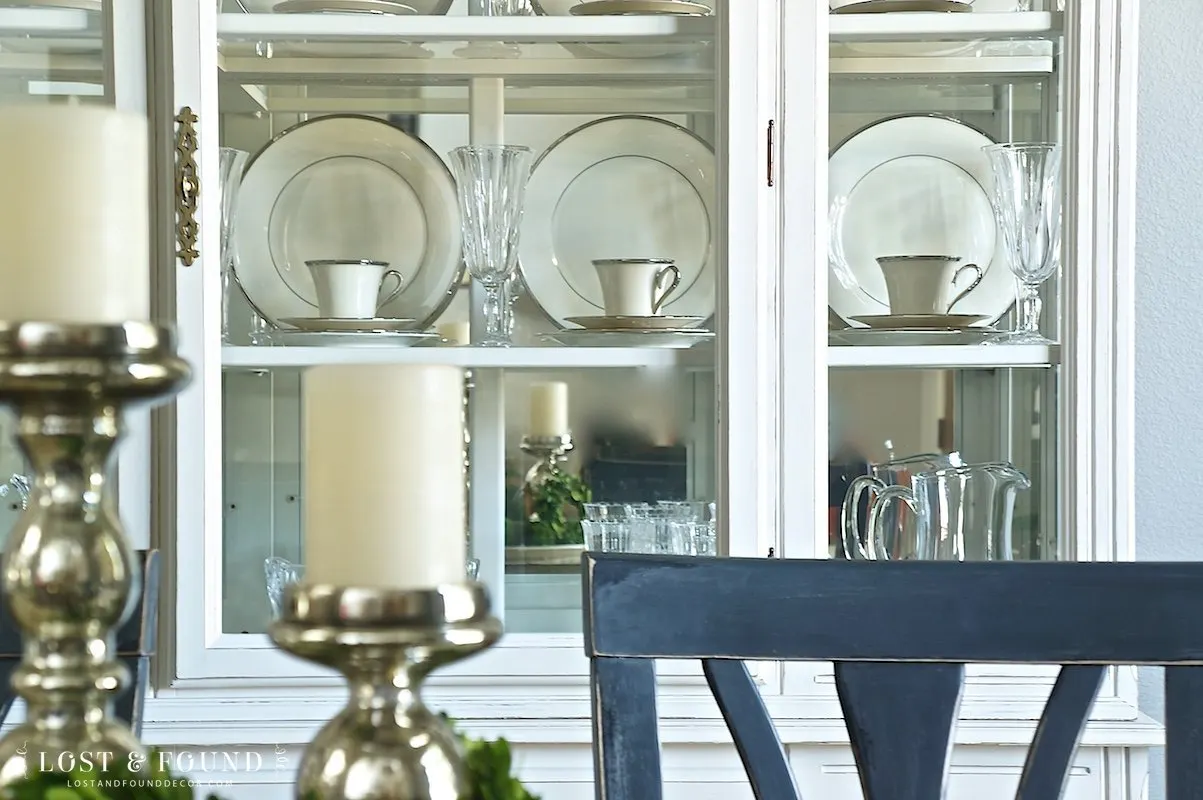
The client loved how this piece turned out! And I have to admit, it looks pretty amazing in her gorgeous dining room.
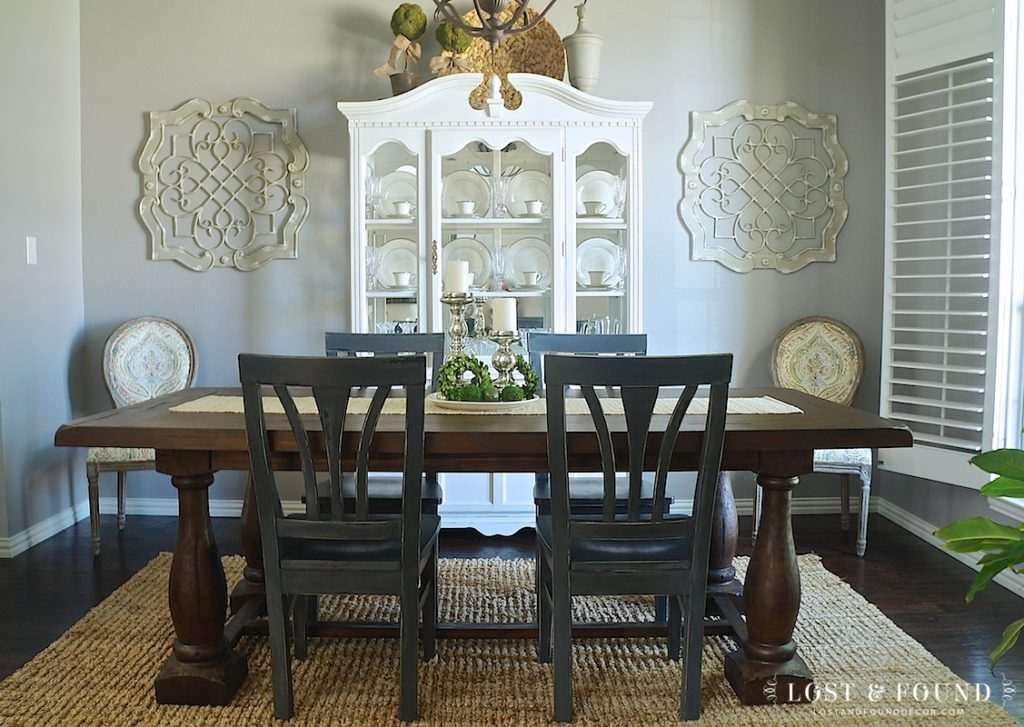
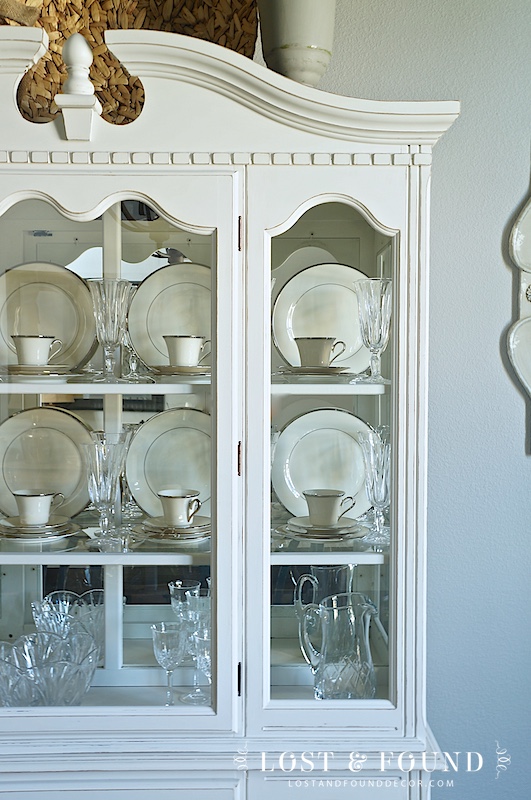

Her display of white dishes looks amazing, staged on the open glass shelves.

 Fusion on its own will provide a highly durable, waterproof finish.
While moving the cabinet back into her house, we left a few dirty fingerprints on the top molding. I showed the client how a wipe with a damp rag took away the dirt in seconds.
I really enjoyed photographing her beautiful space, if you can’t tell 🙂
The day after we delivered it back to her, my client hosted her daughter’s birthday party and had the chance to show off her new cabinet.
It’s fun to be able to provide people with something beautiful they are proud to display.
PIN THIS FOR LATER!

So the moral of the story is, don’t give up on your old furniture! If you have an old cabinet, all it may need is some fresh paint for a totally new look.
MORE CHINA CABINET MAKEOVER IDEAS
There are other creative ways to update an old china cabinet. Here are a few more projects you may enjoy!
VINTAGE CHINA CABINET IN LIGHT GRAY
BEAUTIFUL BUFFET IN FARMHOUSE WHITE
BOLD COLOR BOHO STYLE ARMOIRE MAKEOVER
FINAL THOUGHTS ON THIS CHINA CABINET MAKEOVER
We are all in need of storage options in our homes, but these larger-than-life types of furniture pieces are a bit out of style. How can you enjoy the storage a china cabinet gives you, while also updating it to fit your modern decor?
Like we did today, you can paint it a fresh, lighter color to help it not feel so big and heavy in your room. You can also add new hardware to change the style of the cabinet, or add pretty fabric panels on your doors instead of the glass inserts.
There are so many creative ideas out there, why not try one before you go spend thousands on a new piece of furniture? I hope this post inspired you today to update your own china cabinet and gave you some direction for how to get the project done!


Home Imagined Link Party #22 - The Antiqued Journey
Sunday 19th of January 2025
[…] Flea Market Decor Shopping Memphis China Cabinet Makeover […]
Mid Century China Cabinet Hutch Makeover - Reinvented Delaware
Tuesday 9th of January 2024
[…] China Cabinet Makeover Before and After by Melanie at Lost and Found Decor […]
Val
Tuesday 18th of July 2023
You’ve done such a beautiful job of this cabinet! It never ceases to amaze me what you can do with paint and your talent! It is just gorgeous in your client’s room.
Fusion paint is so lovely to work with. It is so easy to get a smooth, silky, brush mark free result for an amateur like me than I’ve found in any of the many other paints I’ve tried.
Melanie Alexander
Wednesday 19th of July 2023
Thank you Val! And so glad you enjoy working with Fusion as well :)
Janet
Tuesday 11th of July 2023
Gorgeous makeover! I've been plotting to paint my own cherry china cabinet, so this was inspiring to see.
Melanie Alexander
Wednesday 12th of July 2023
Great! So glad it was helpful. I bet yours will be gorgeous :)
Home Imagined Link Party #22 - Master"Pieces" of my Life
Tuesday 11th of July 2023
[…] stunning china makeover before & after flea market decor shopping in Memphis […]