When I first started painting furniture pieces to sell about 4 years ago, I wanted to antique finish everything. Dark wax was all the rage and every piece I saw around me seemed to have that aged, vintage finish.
But as time went on, I found myself using an antiqued finishes less and less often. Rather than using wax or glaze to create that aged look on each and every piece I painted, I kept them for only certain types of pieces or to solve specific problems.
Making over furniture is like any other skill–practice makes perfect! The more pieces I paint, the more I learn how to style and design a piece in a way that works.
Nowhere is this more true than in how I now use glaze and dark wax–sometimes it creates a great finish for a piece, but sometimes it only adds visual clutter.
So today I want to share with you what I’ve learned over the years, and how I decide whether or not I want to create an antiqued finish on a piece.
Also, I’ll share how I’ve used glazes and dark waxes to solve some common issues I’ve encountered with furniture pieces I’m painting.

This post may contain affiliate links · This blog generates income via ads
When Is It Helpful to Use Antique Glaze or Dark Wax?
The first is likely the most obvious:
1. Adding Interest to a Piece with Lots of Detail and Recesses
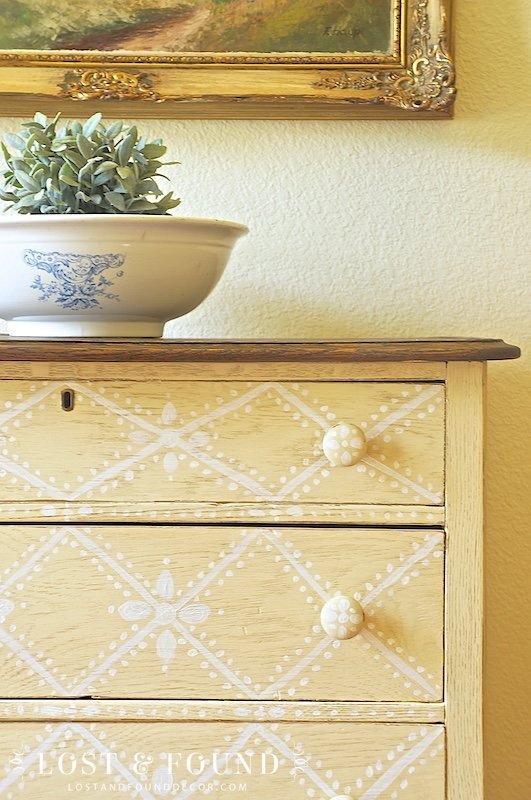
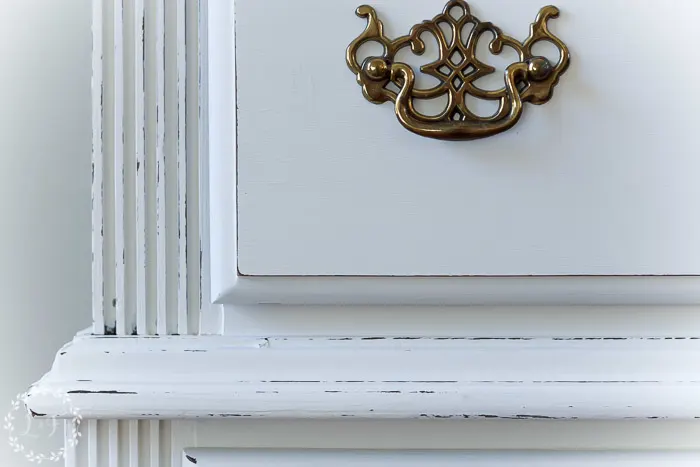
A furniture piece that has carved details, trims, recessed panels, planks, etc is just begging for an antiqued finish!
A glaze or dark wax will settle into all of those recesses and grooves, creating an amazing aged look.
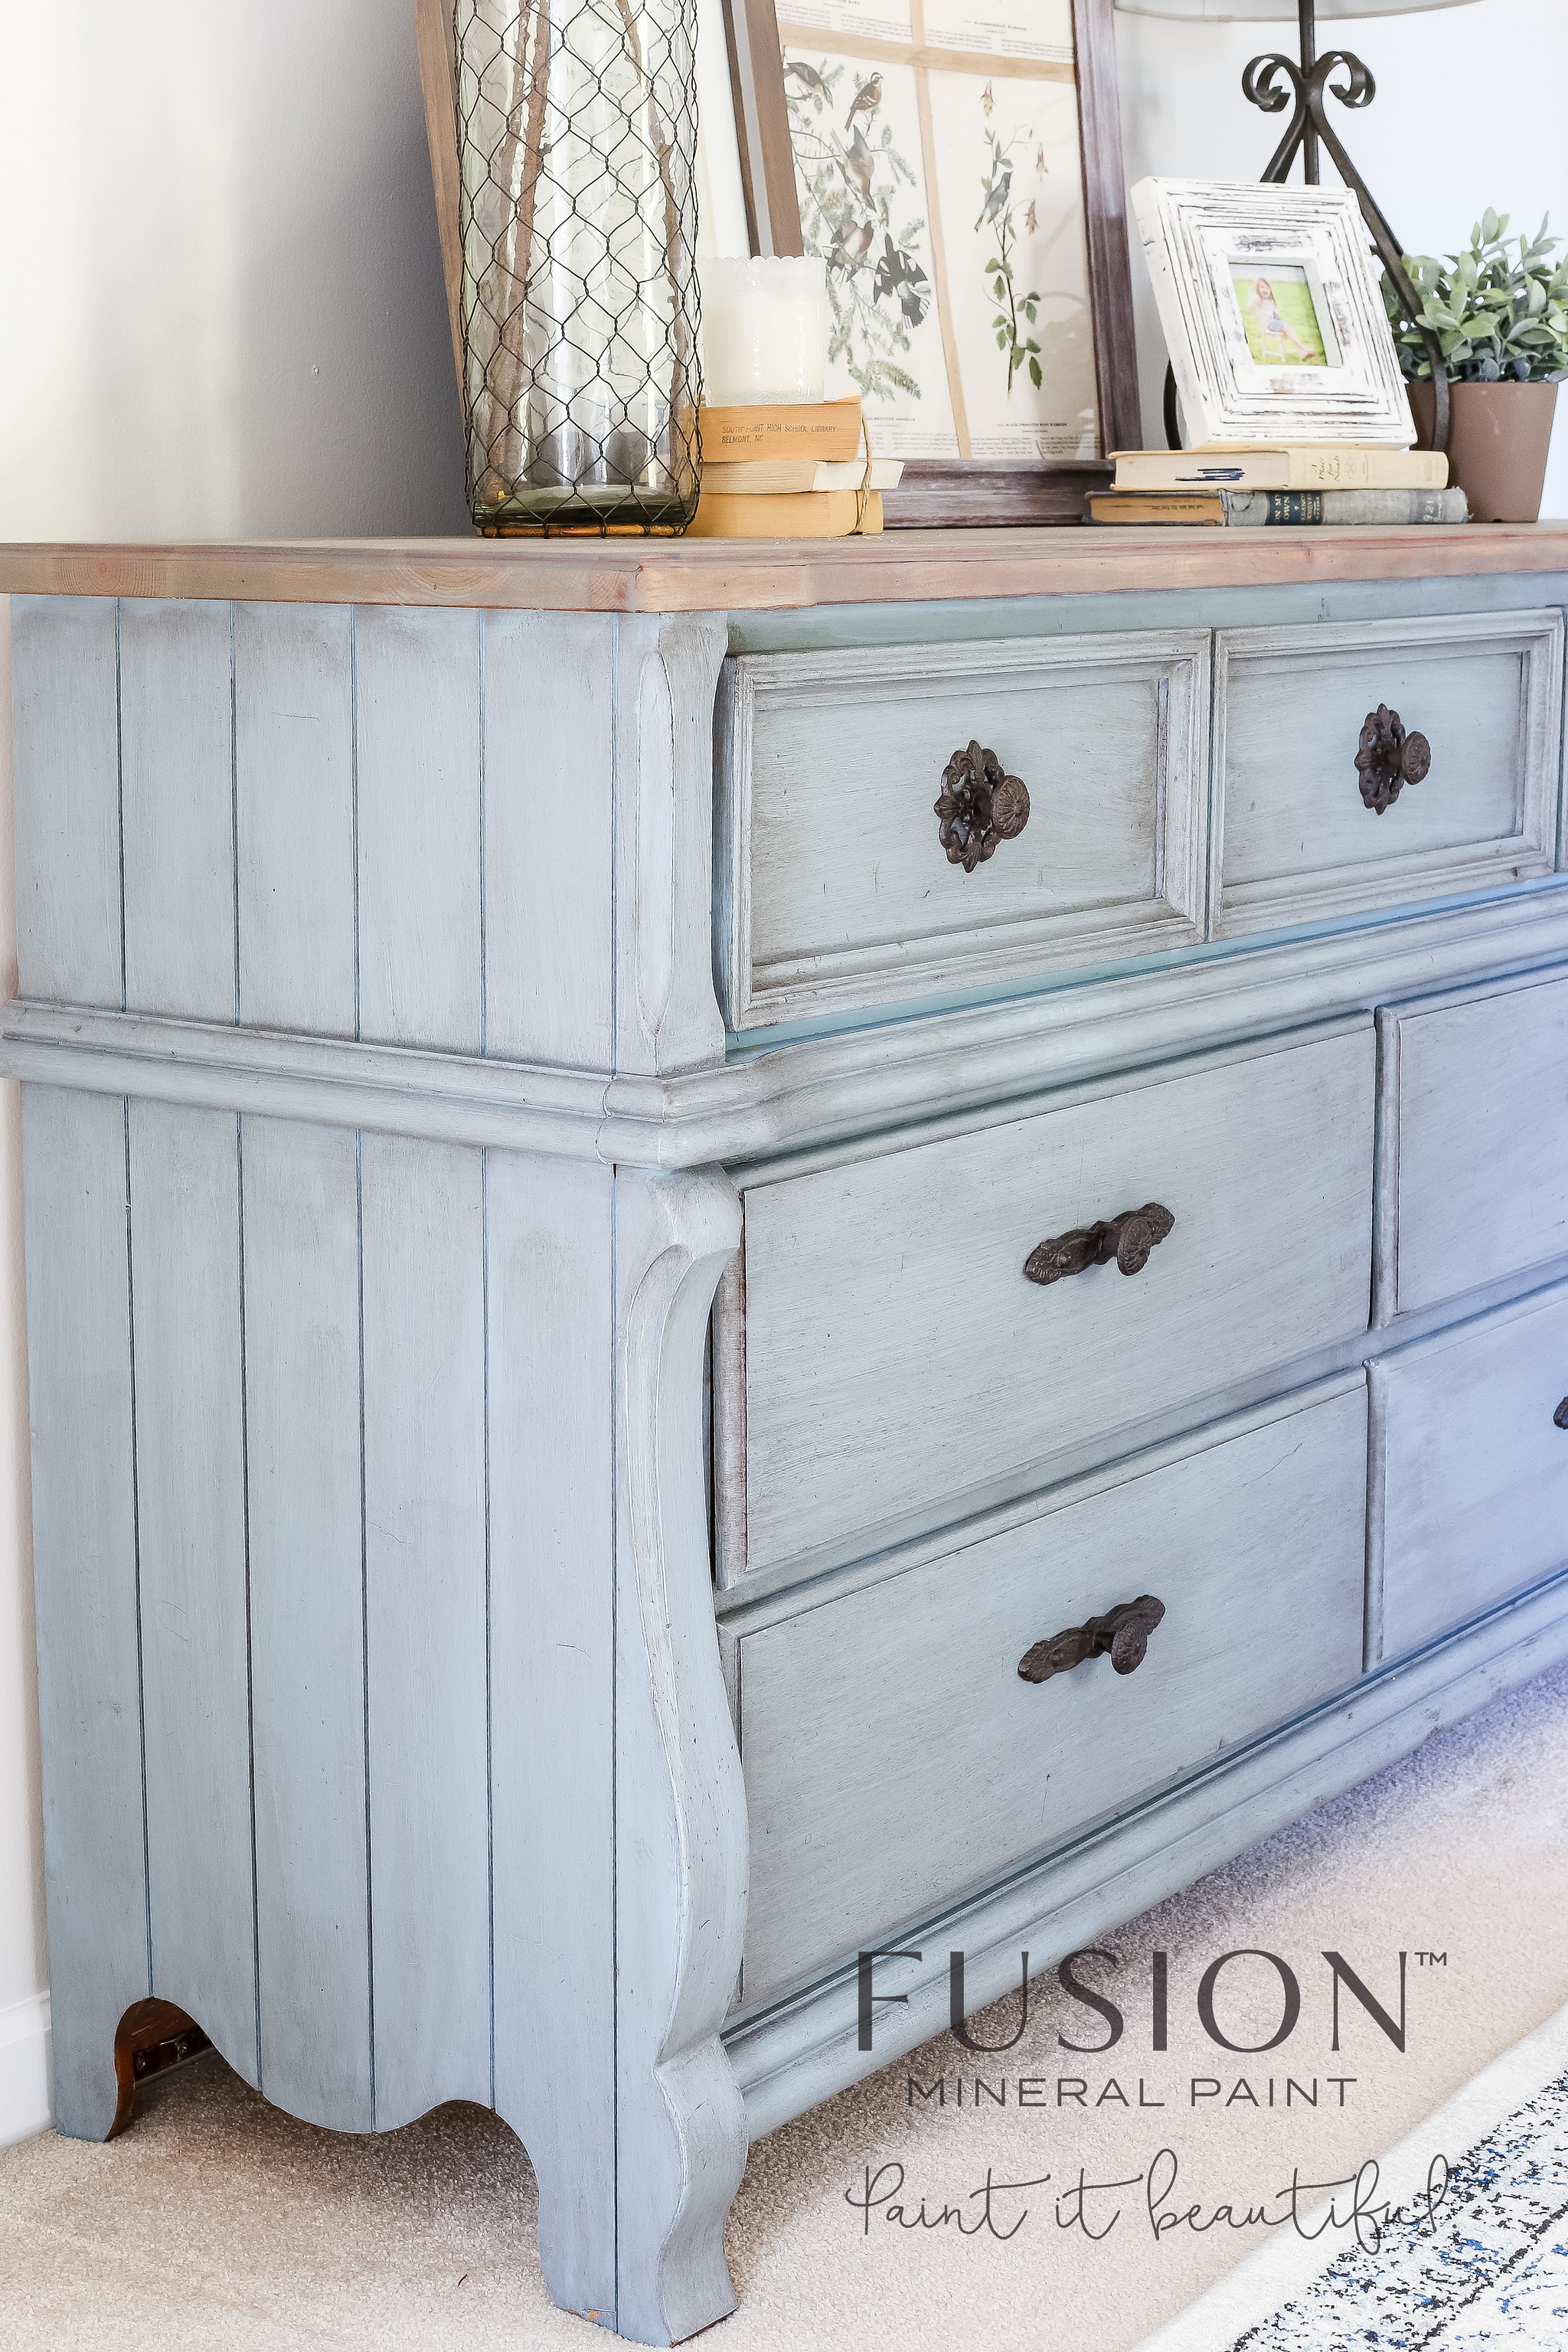
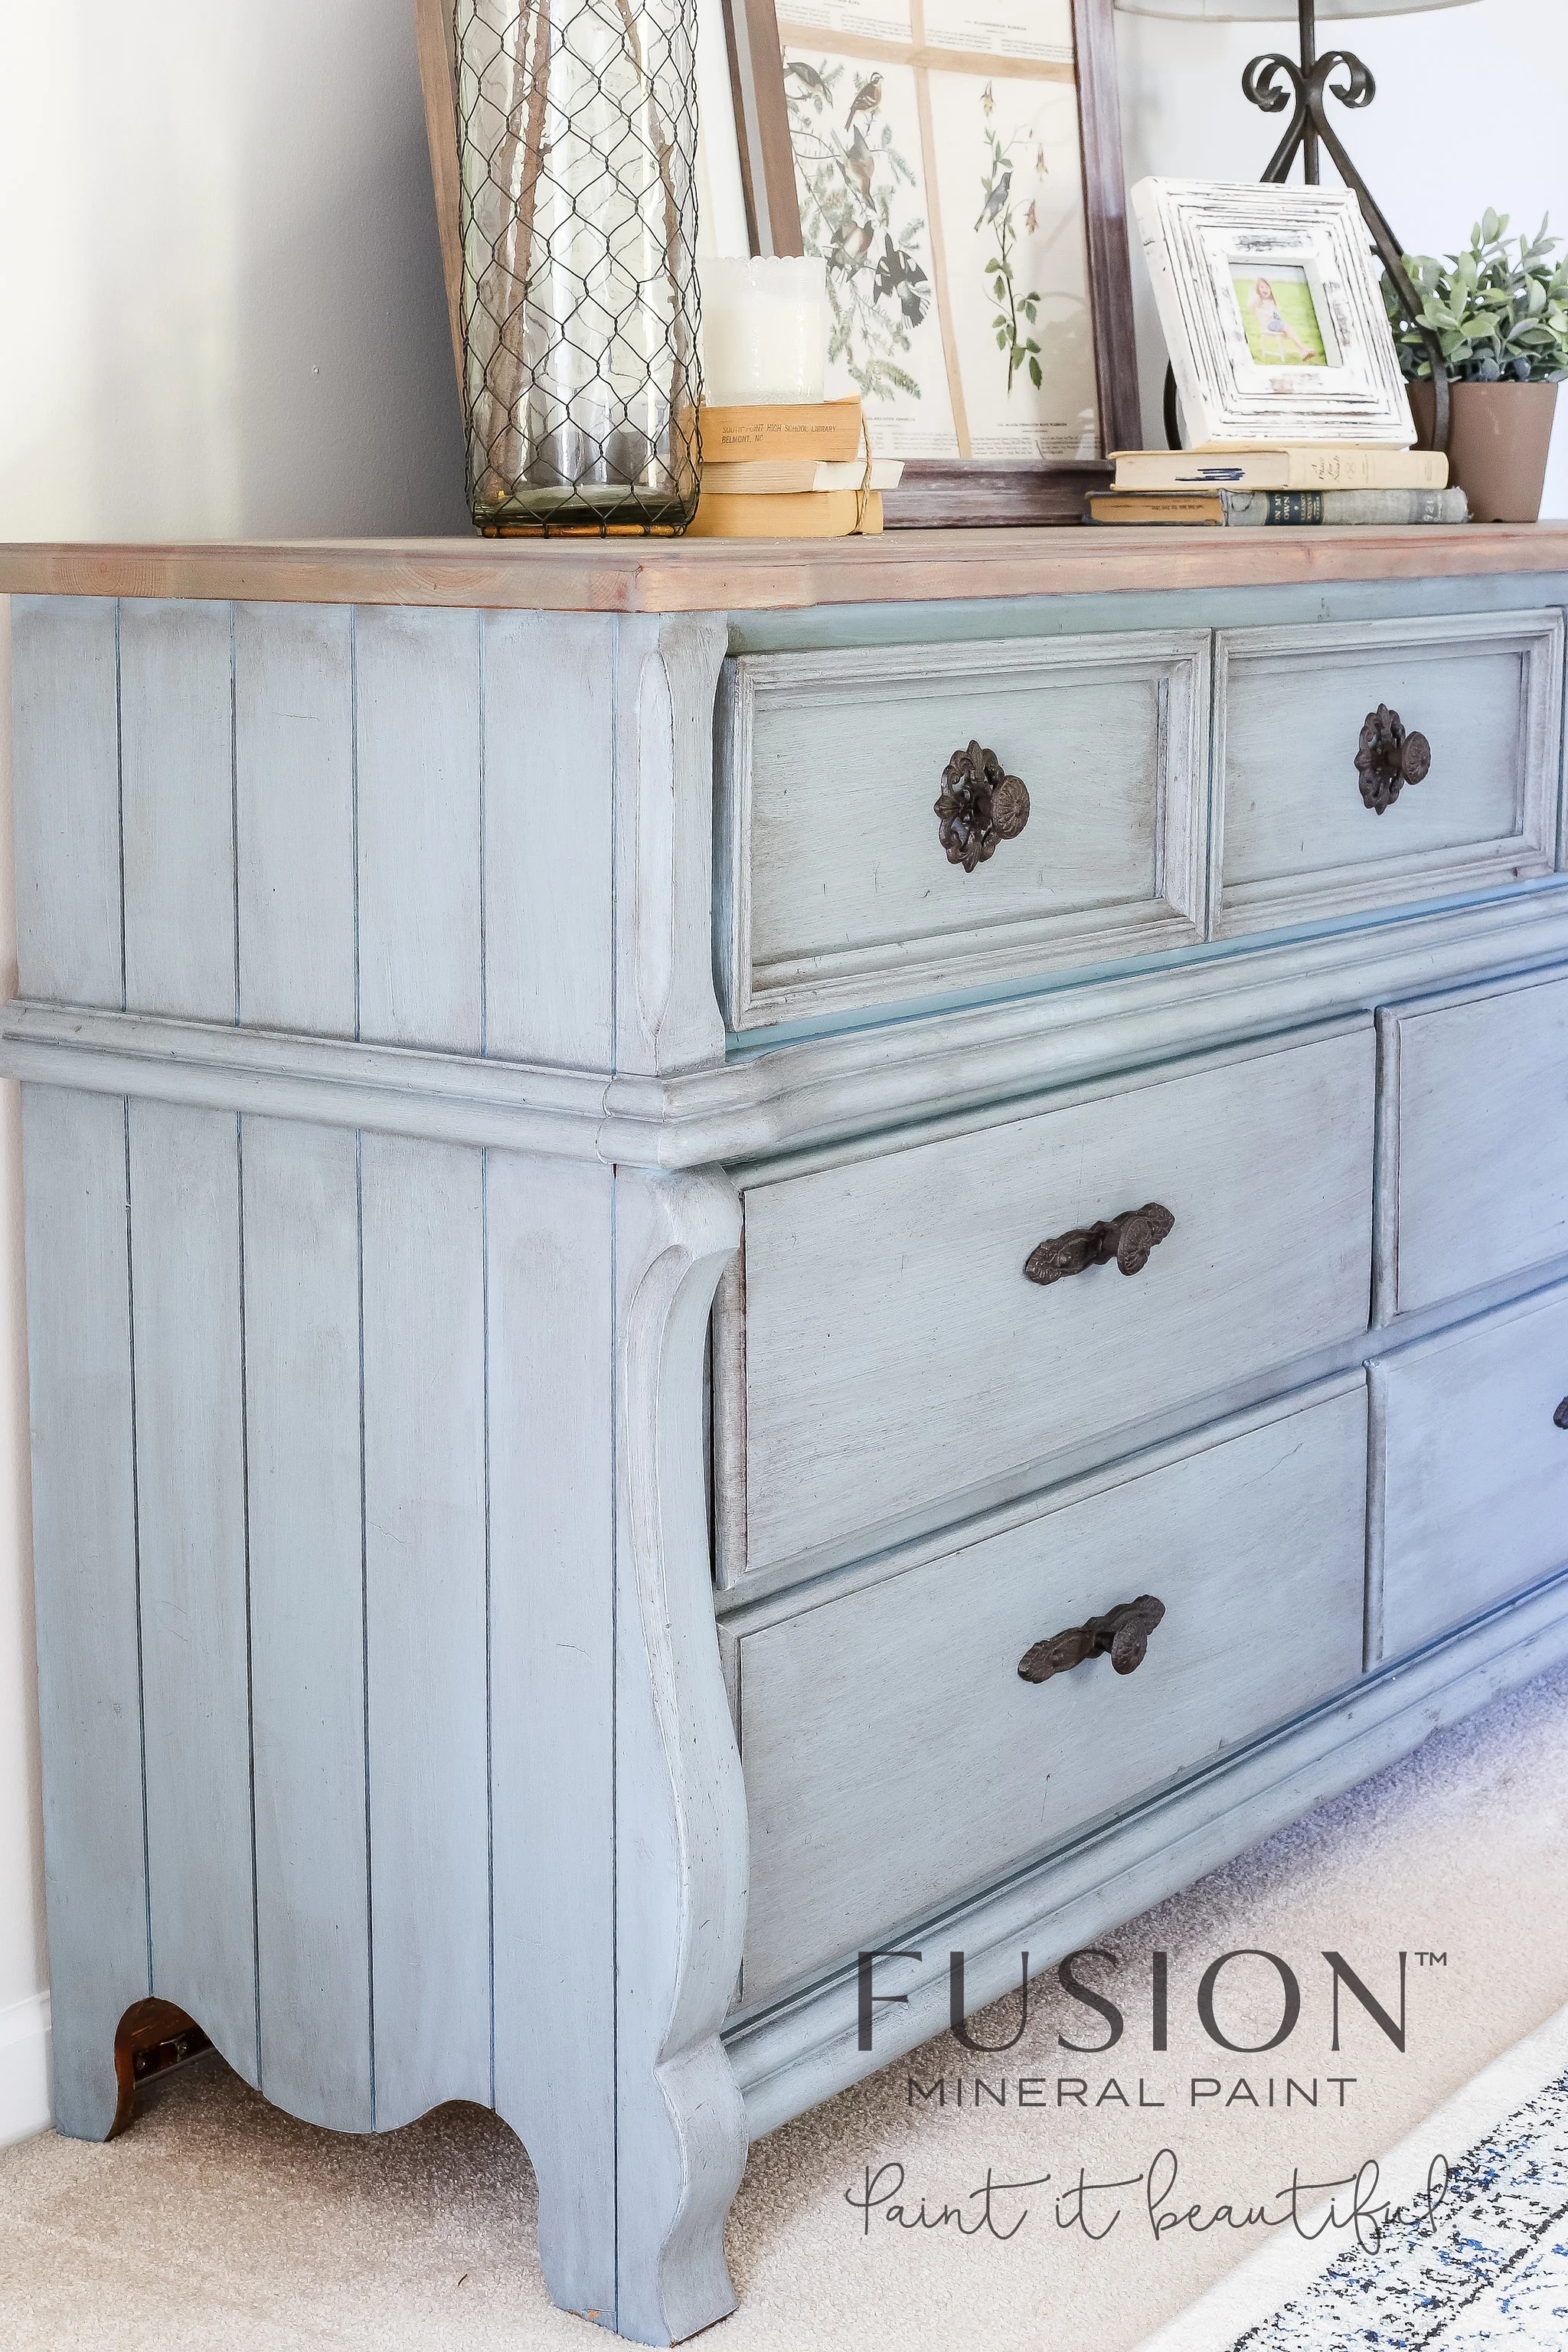
The above piece was painted in Fusion Mineral Paint Champness and topped with the Fusion Espresso Wax.
All of its curves and trims are accented by the dark wax, which really brings out the details of the piece.
Many vintage pieces have great carved details or trim, and so they lend themselves well to the antiqued finish look.
2. Adding Age and Depth on a Piece You Can’t Distress
Sometimes you wind up painting over a finish that you want to completely cover up, like this yellow/cream laminate you find most 1960’s French Provincial pieces out there . . .
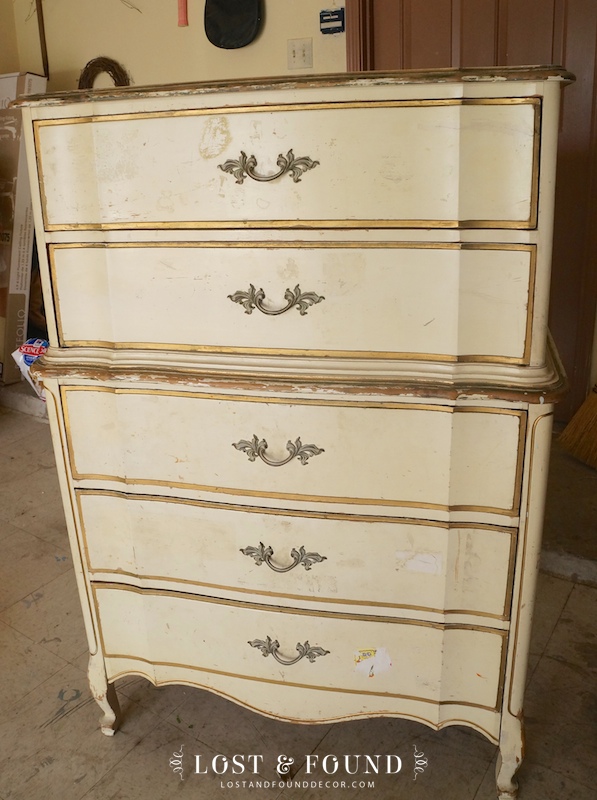
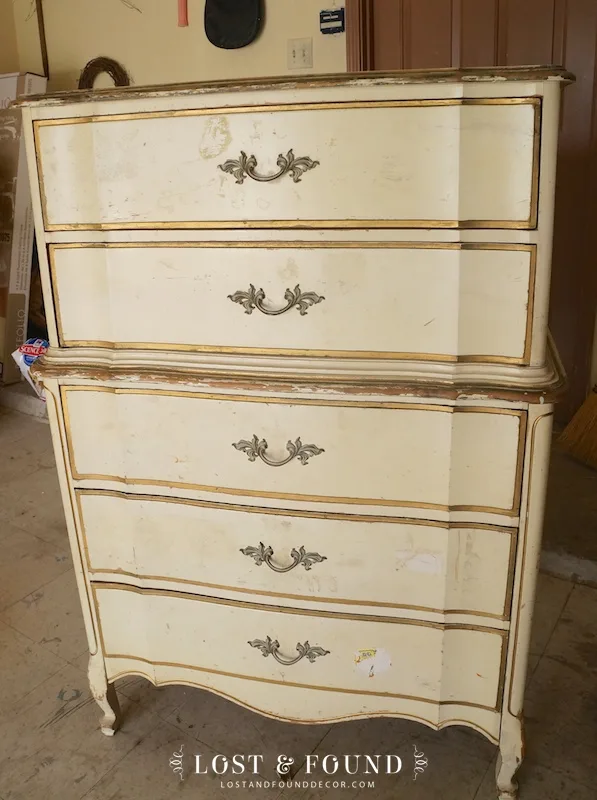
In situations like these, using an antiqued finish will add that vintage age that you can’t get through distressing.
Why Distress?
Besides creating a vintage look, distressing a piece after you paint also adds a little contrast and visual depth to the painted finish.
And unless you’re going for a super-sleek modern look on a modern-styled piece of furniture, I think it’s usually a good choice to distress your painted pieces.
The amount you distress can vary–it can be extremely light or more drastic–but even just a tad bit of sanding back of the paint along the edges will help create a more authentic and interesting finished piece.
But sometimes there’s a problem . . .
When painting over wood laminate, or another paint color that you don’t want to show, distressing may not be an option. In that scenario, a glaze or dark wax is your friend.
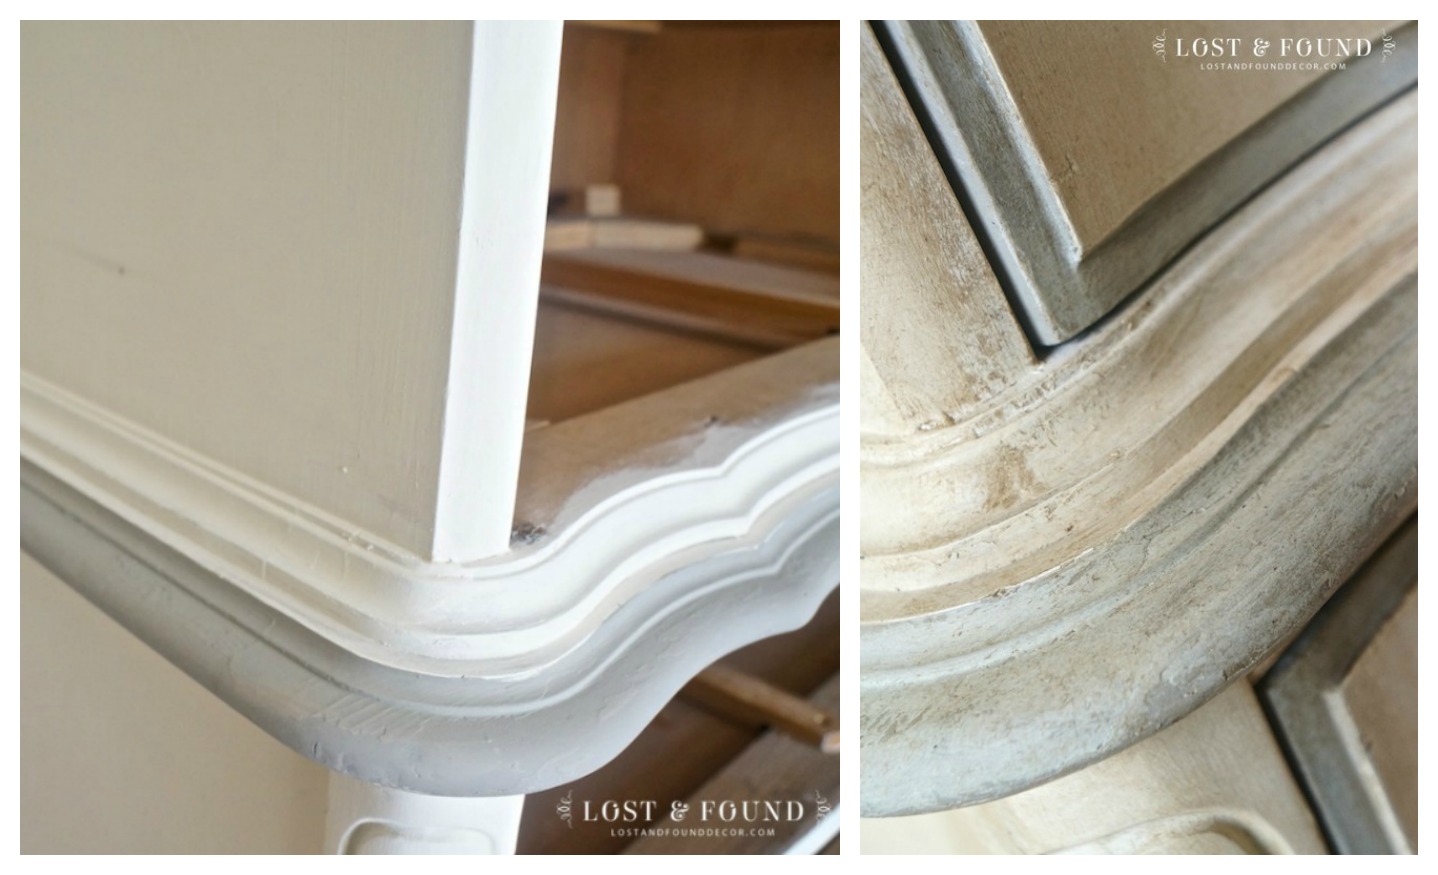
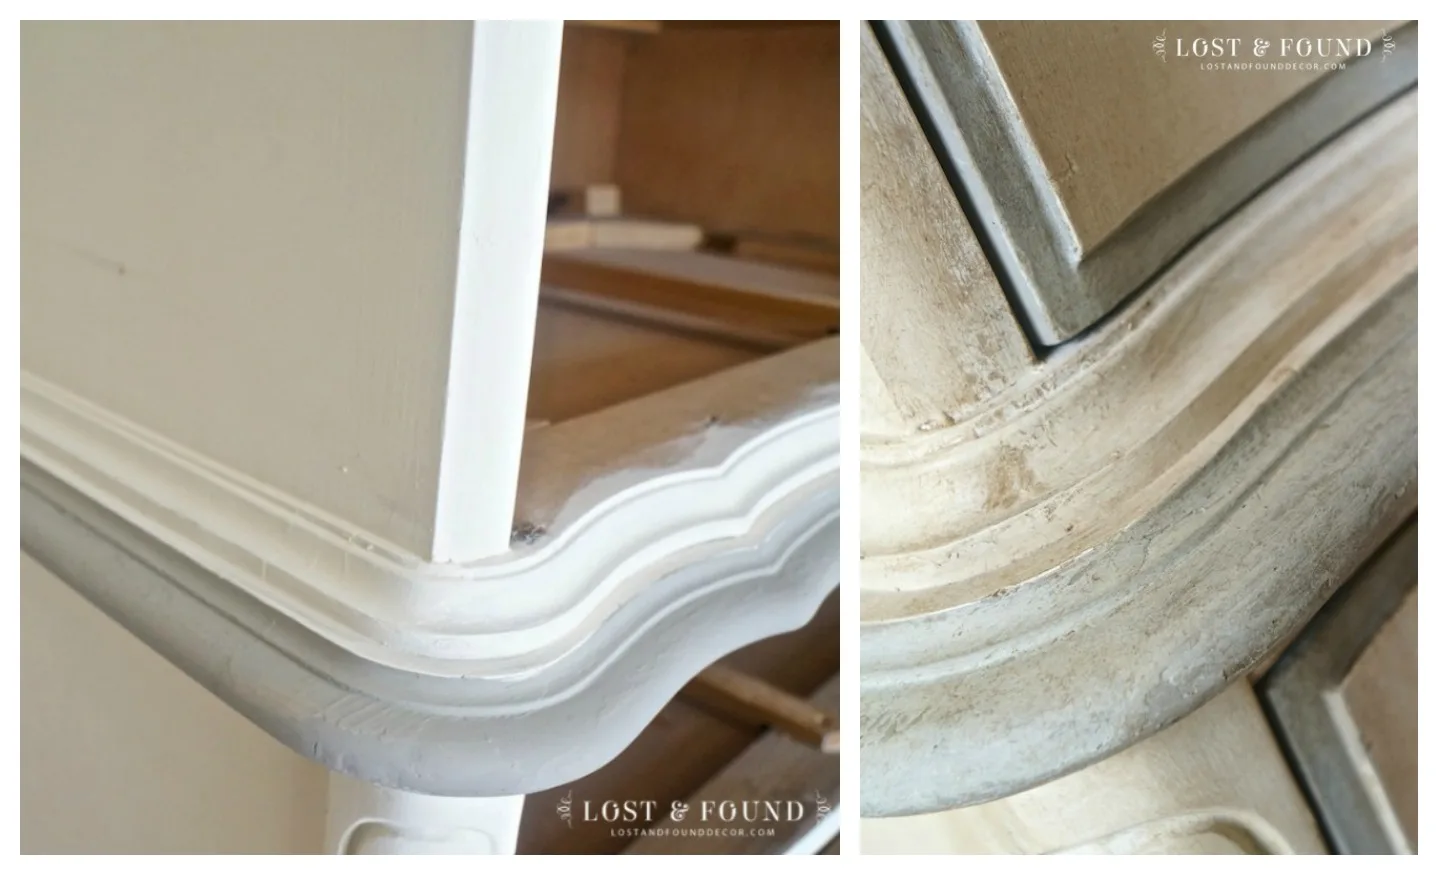
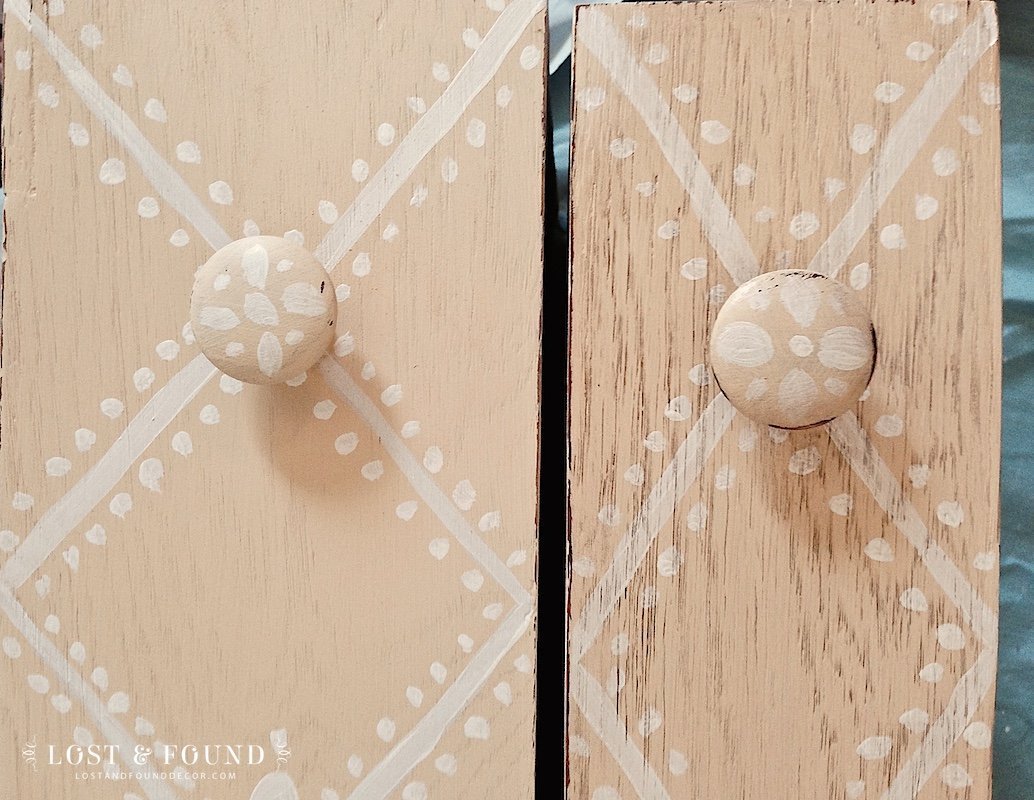
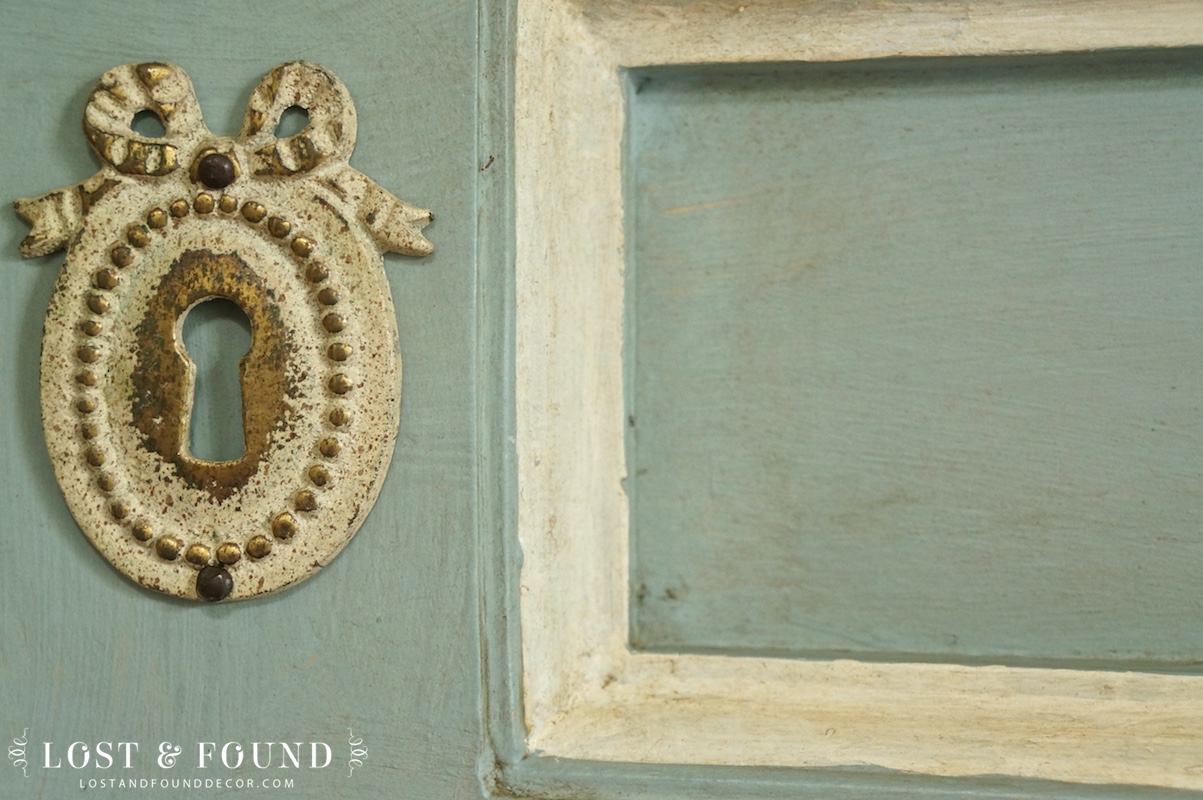
Below is a close-up photo of the details on this same chest, after I painted a base coat of white and some blue trim.
On the left side there is no wax, and you can see how the finish looks a little too stark and clean (remember again, if I sand off some paint to distress that ugly gold/yellow laminate will show through!)
On the right side though, I’ve applied dark wax to the same area and there is a lot more age, depth, and interest to the finish.
Which leads nicely into my next situation when an antiqued finish is helpful . . .
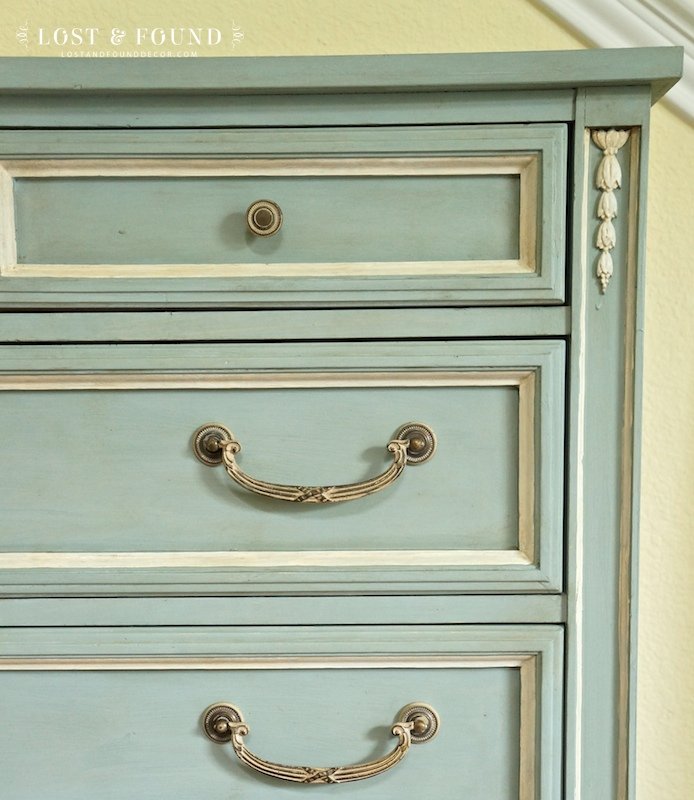
3. Blending Colors and Painted Details Together
Take another look at this same French Provincial Chest, with dark wax partially applied:

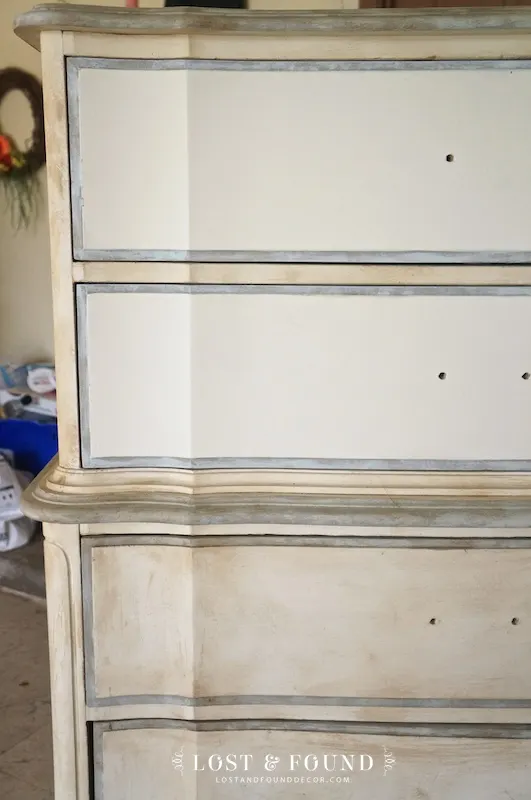
Now I will admit that my dark wax job isn’t so great in that photo! But despite that, can you see how the antiqued finish of the dark wax makes the contrast between the white drawers and blue trim not so stark?
I love adding detail painting to pieces, but am always a little wary that it may turn out looking slightly childish.
I hope that doesn’t sound bad, but when I see a stark contrast of colors paired together on a piece of furniture it makes me think of children’s furniture, with those primary colors stacked next to each other–do you know what I mean?
I find that using a wax or glaze over detail painting does a great job though of blending the colors together in a way that looks more sophisticated.
Here’s another example, on a chest where I painted the base blue and some details in white:
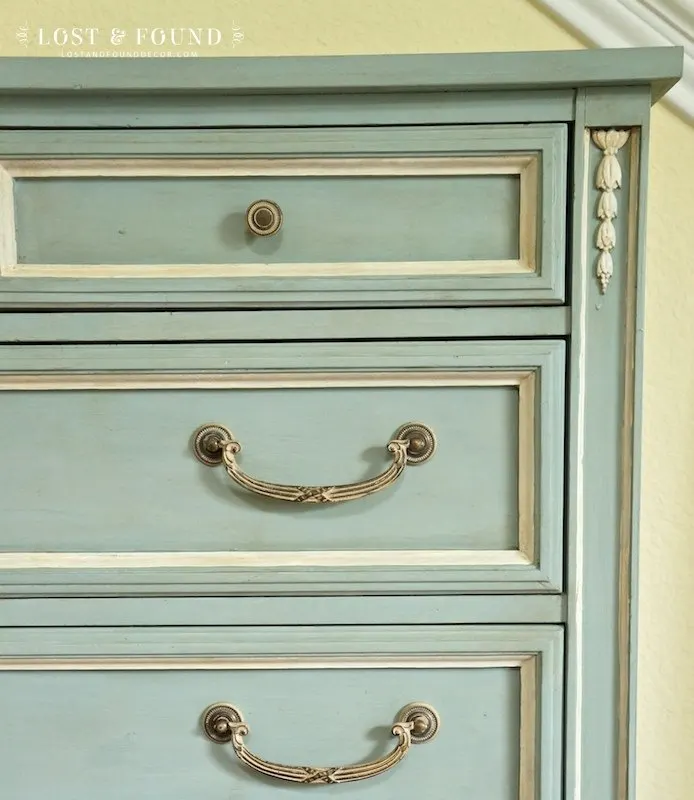
So when adding painted, contrasting details, try using an antiqued finish to help blend the colors together more seamlessly.
4. Bringing Out the Wood Grain After you Paint
This specific situation seems to work better with a glaze than a wax, but in a pinch a dark wax will help bring out wood grain also.
These are 2 drawers from an oak washstand I painted. The one on the left has no glaze, the one on the right does.
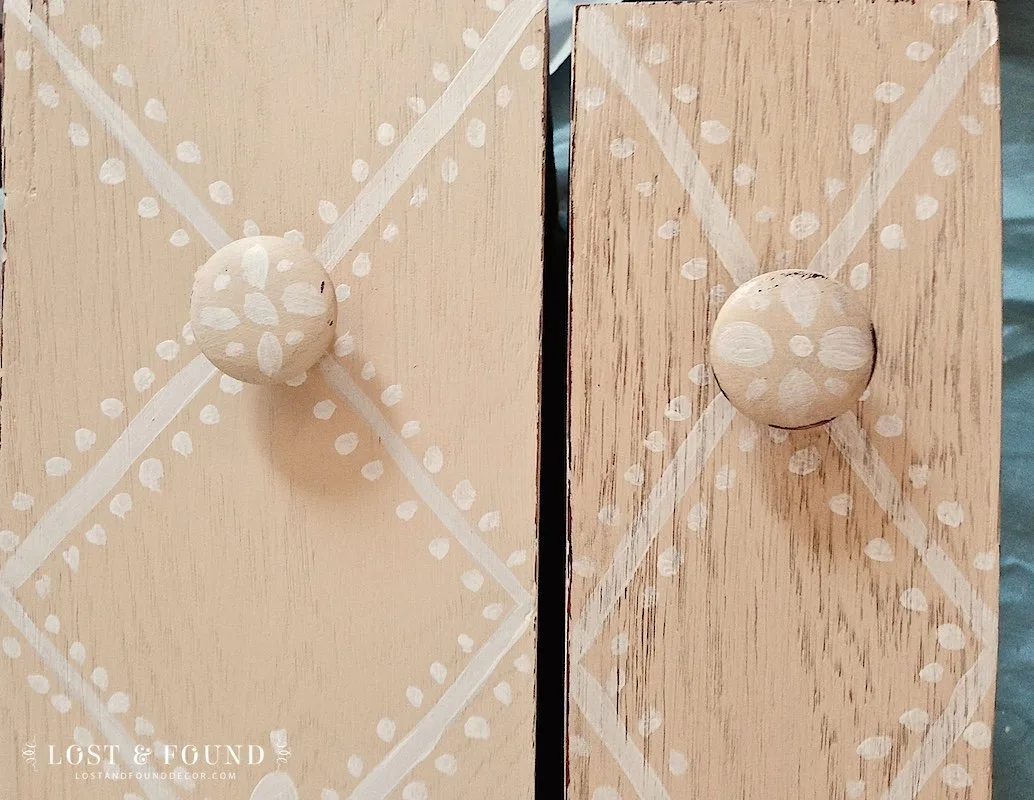
See how the glaze settled into the deep wood grain and drew it out?
Now you see all that awesome, beautiful wood texture again that gets lost when old wood is painted.
Topping off oak or old pine pieces with an antique glaze is one of my favorite techniques for adding age and character.

5. Making a Cool-Toned Color more Warm-Toned
Sometimes you get a color onto a piece and it winds up not being the color you had in mind.
Case in point with the Fusion color Soapstone that I painted on my kitchen island.
I love this color, but the light in my kitchen made it look super blue–and I wanted more of a warmer gray.
Problem solved with an antique glaze!

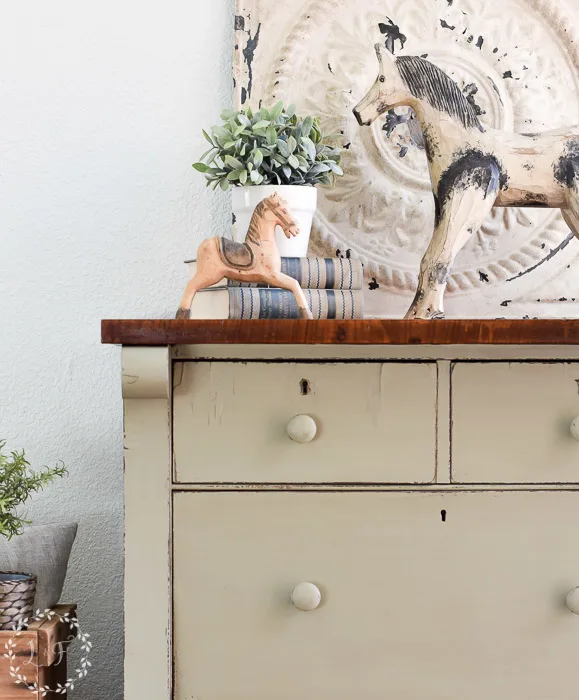
I also used this technique recently on a chest of drawers I painted in Fusion’s Lichen.
I kept the burled wood veneered top of the chest, and found once I painted the base in Lichen, the color was still a little too cool compared to the warm wood top–they didn’t blend well together.
So I added the Espresso Wax on top of the Lichen color to warm up the tone a bit, and now the color blended with the wood top perfectly.

6. Fixing a Common Distressing Problem
Have you ever been sanding back the edges of your painted finish to distress it, and actually sand off the underneath wood stain to expose raw wood?
This is a common problem I find when working with older pieces; many times the wood is worn and the layer of stained finish is quite thin.
When this is the case, it doesn’t take much sanding at all to wind up sanding off the thin, stained layer, leaving you with bright raw wood showing through your painted finish.
Typically, when you’re distressing, you want the beautiful stained wood finish to show through, like this:
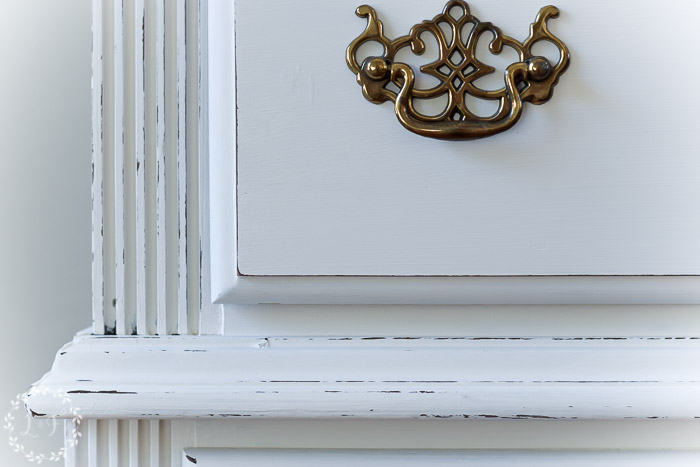
Exposing raw wood becomes even more of a style issue when using dark colored paint–the raw wood kinda screams “Hey! Look at me!! She distressed too much!!” because it is so bright against your dark paint.
I have found you can often disguise these spots with a layer of antique glaze or dark wax.
Sometimes the brown in the glaze or stain is just enough to warm up those raw wood spots so you don’t notice them quite so much or even at all.
So, now we have 6 situations where creating an antiqued finish is a good fit for your piece.
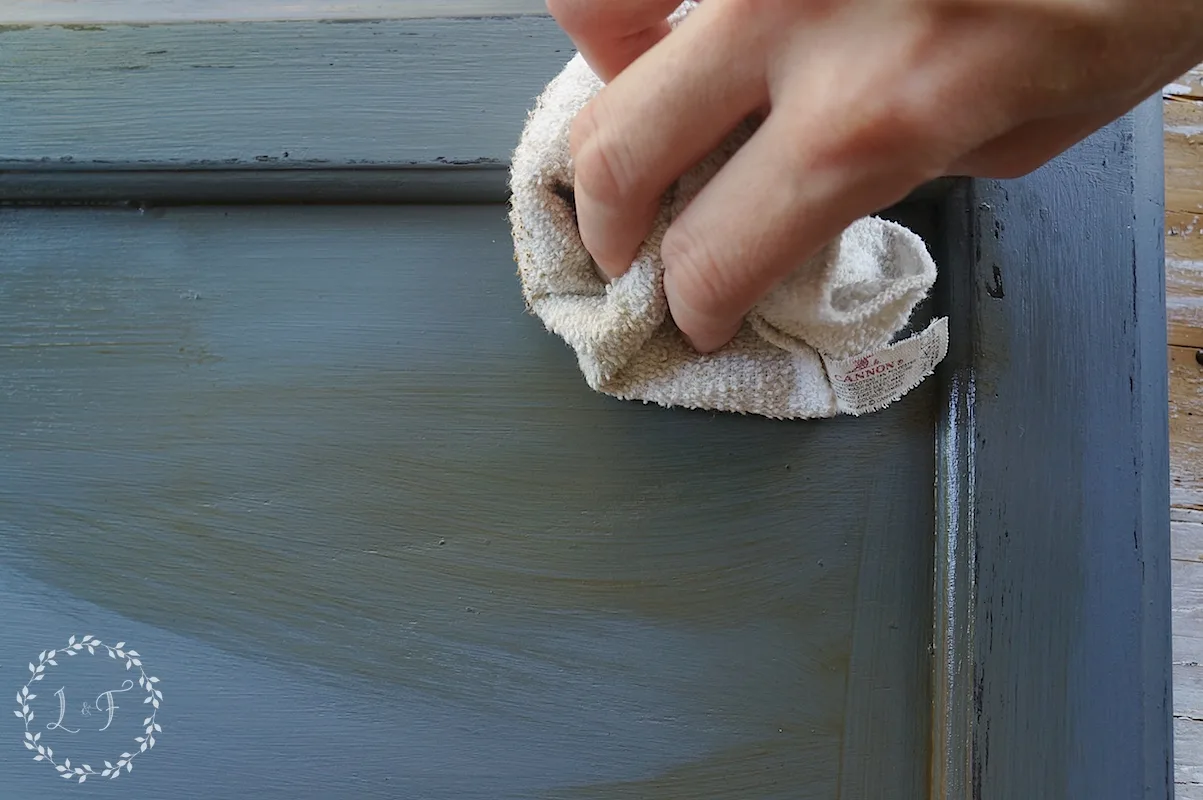
How Do You Use an Antique Glaze?

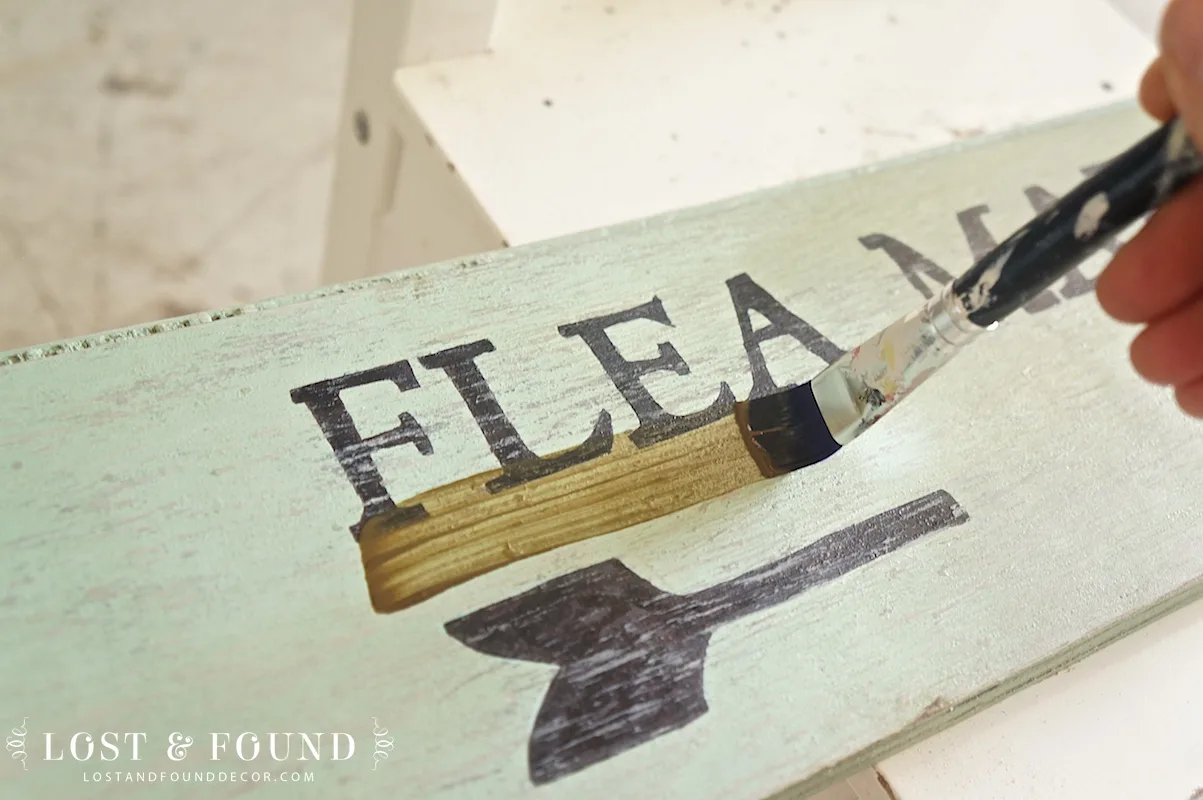
A glaze comes in a liquid form and can be applied easily with either brush or a cloth.
Personally, I like using a brush because I find it less messy.
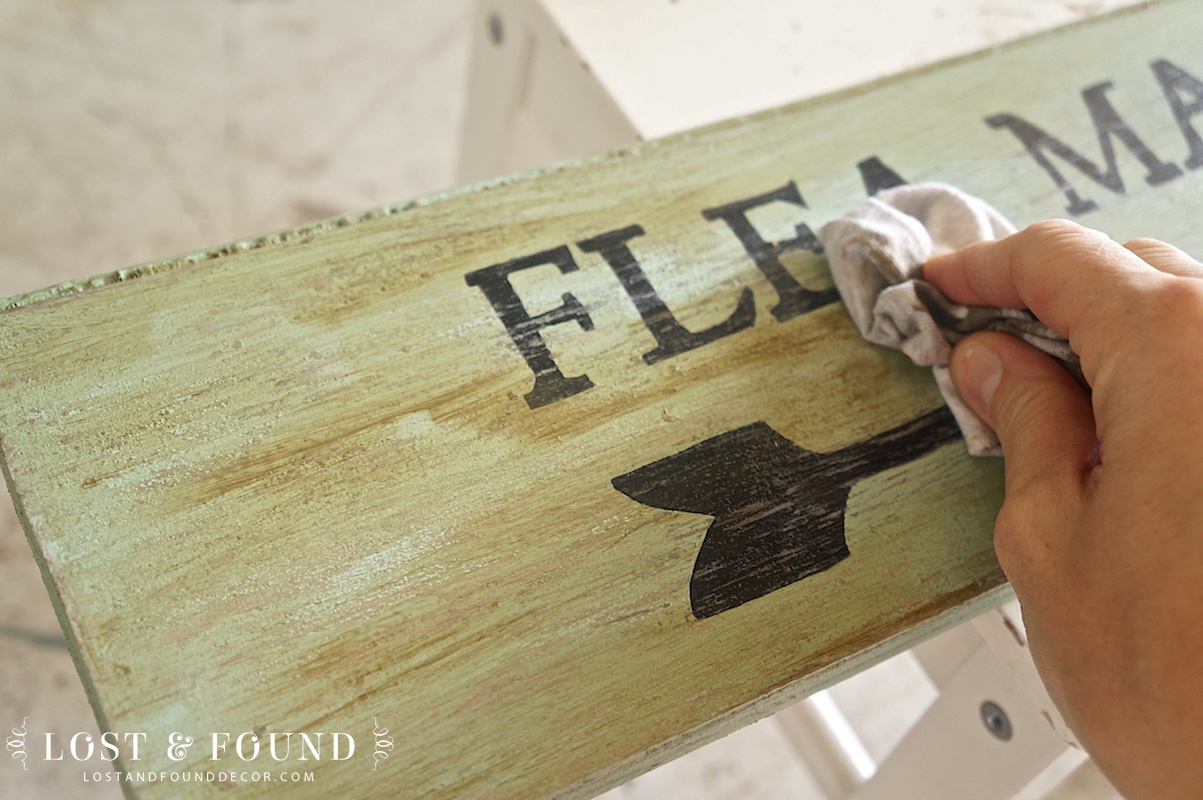
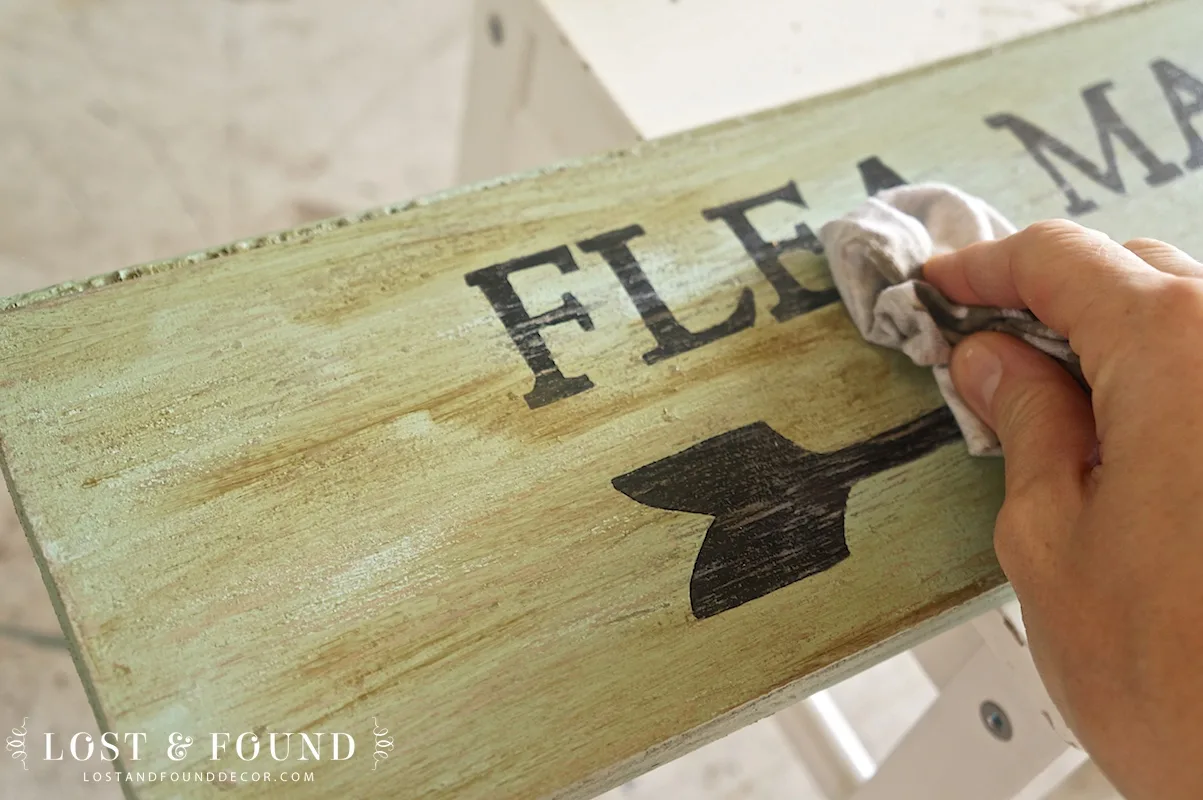
Once you brush on the glaze, you wipe back the excess using a lint-free cloth.
Fusion offers both an already-tinted Antiquing Glaze, as well as a Clear Glaze.
With the Clear Glaze, you can mix in a little bit of any other paint color to create a custom-colored glaze.
RELATED POST: How to Apply Glaze to Painted Furniture VIDEO TUTORIAL
So say you wanted a pearl finish on top of a piece . . . Just mix in a little metallic pearl to the clear glaze, brush on, then wipe back!
It’s easy to add a little extra color with a glaze.
Personally, I like working with a glaze more than a wax because I find it is smooth going on and provides a more uniform aged look.
One drawback to a glaze is that it will not work to seal a painted finish on its own.
So if you are using a chalk type paint that needs to be sealed, you will still have to put another topcoat on top of your glaze to seal the finish.
With Fusion of course, the paint seals itself so no topcoat is required–which is why I tend to go with the glaze more. If I was using a chalk-type paint, I would probably go with a dark wax so I can kill 2 birds with one stone–antiquing and sealing.
Another thing to consider is that a glaze can be painted over again, where a wax has to be removed before painting.
So you can easily touch-up a glazed piece if you make a mistake, or repaint it again later, whereas with a waxed piece, you will be doing more prep to remove the wax before you can paint.
How Do You Use a Dark Wax on Painted Furniture?
It was interesting–preparing for this post I took a little survey of furniture painters I know, asking them if they prefer a wax or a glaze for an antique finish, and most of them said a wax.
So I guess my preference for glazing puts me in the minority!
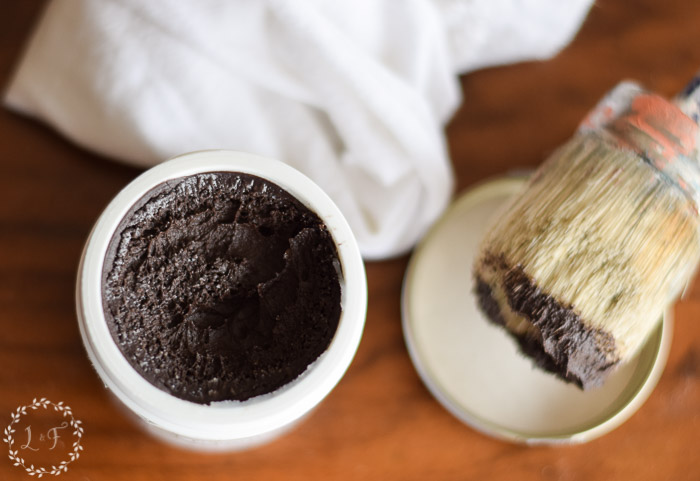

Like a glaze, wax can be applied also with either a brush or a rag.
With whatever tool you use, the key is to push the wax down into the corners and recesses of the piece–you want the wax down in the cracks!
I usually find a brush does a better job at this, so that’s my go-to tool.
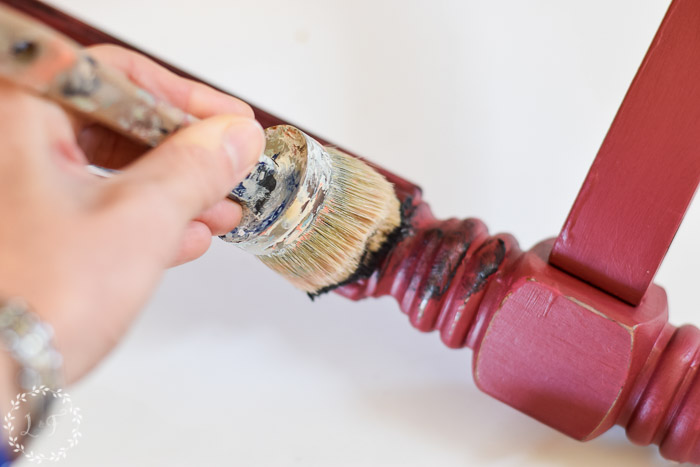

And again like a glaze, you will go back and wipe off any excess with a lint-free cloth after your wax sets for 2-4 minutes.
I have found that dark wax takes a little more practice to do well.
It’s easy to over wax a piece, and wind up with a super-dark, streaky finish (kinda like my French Provincial chest I showed up earlier! I was still learning 🙂 )
Often, I recommend putting a base of clear wax on your furniture piece first, or mixing in a little clear wax with your dark, especially if you are using a chalk-type paint!
Why does this help?
The chalk paint will soak up the pigment of the dark wax, making it very hard to get it back off if you apply too much. But adding clear wax first or mixing clear in with your dark will help you remove the extra dark wax if necessary.
Fusion doesn’t require sealing with wax, but sometimes you want to add a little more sheen or color.
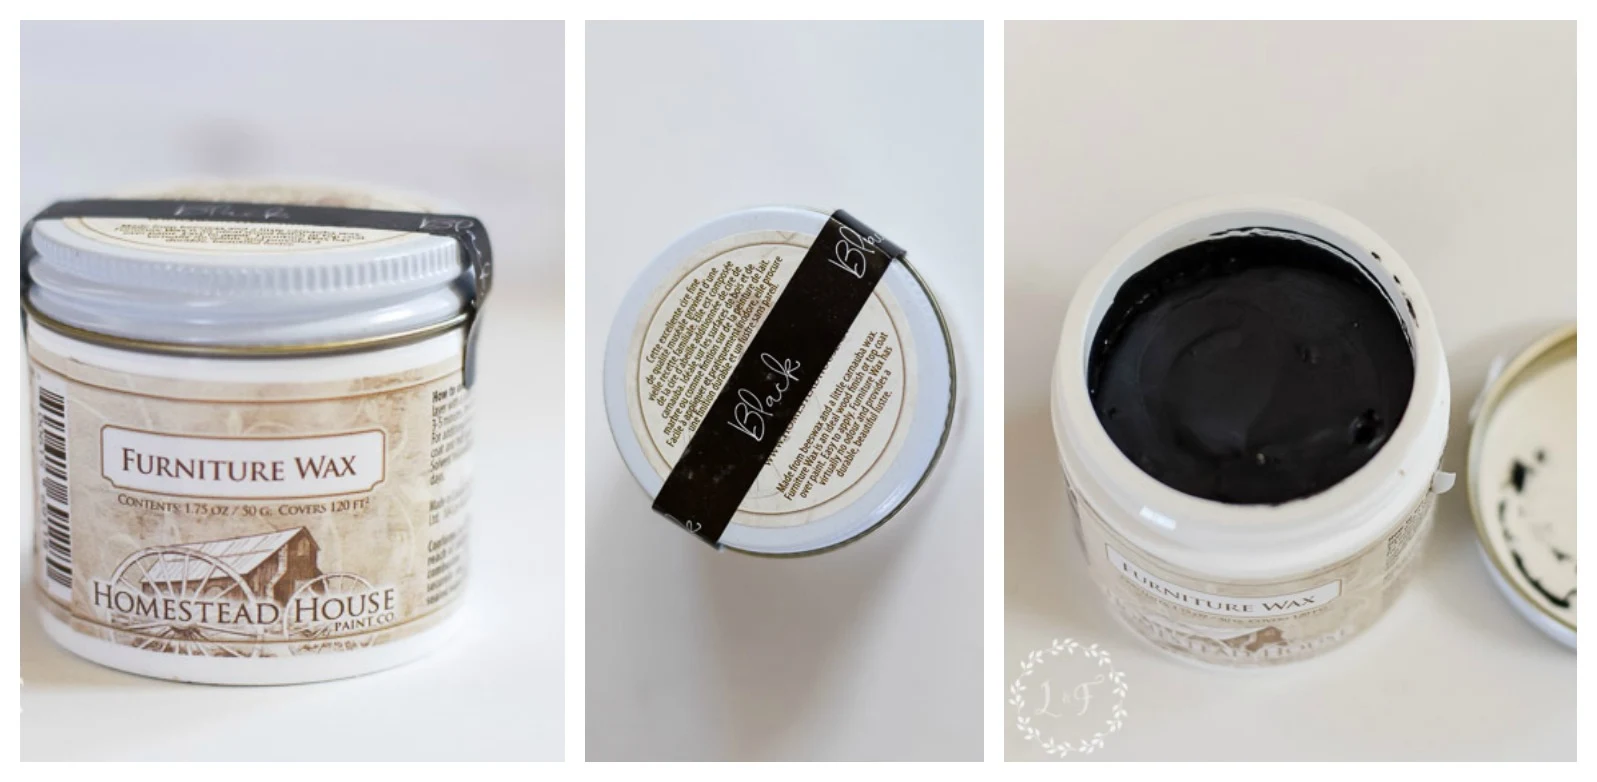
So the Fusion line offers a Black Wax and an Espresso Wax. Each will provide its own unique finish.
The Black Wax will add a more drastic aged finish, while the Espresso is a bit more traditional with the warm brown tones.

One of the benefits of using wax instead of glaze is that a dark wax can be buffed with a soft cloth after it dries to add a little more sheen to your piece. Glaze doesn’t add any additional sheen, and can’t be buffed.
And like I mentioned earlier, dark wax also seals the paint (if you’re using a chalk-type paint or milk paint) and will add another layer of protection to your painted finish.
So if you’re the kind of person that wants extra durability on your painted finish, wax should likely be your pick over glaze.
One caution though I want to mention for dark wax–wax and water don’t work well together.
So I would avoid using dark wax in any wet areas, like on kitchen or bathroom cabinetry, or on a piece that may be outside. For those situations, glaze with a possible extra topcoat is the way to go.
My fellow painters that love using dark wax say that nothing can create a custom, personalized antique finish like a wax–and they may be right.
A dark wax finish can be customized more than a glazed finish, by rubbing more wax into certain areas on a piece and buffing it to a shine.
But in my experience, applying dark wax well in a way that looks appropriate to a piece is an acquired skill that comes with practice.
So if you’re a novice, I would suggest starting with a glaze.

Well there you have it!
That was quite a post! I hope you found it helpful though and that it maybe gave you some ideas on new products or finishes to try.
And if you’re a fan of either glaze or wax, I would love for you to comment and let me know why, as well as see some of your beautiful pieces you’ve created!
Thanks for being with me today, and Happy Painting!


Sandra Stark
Tuesday 7th of October 2025
I am painting my kitchen cabinets with an off-white paint with a water base that is very durable. I want to put a glaze on them just in certain areas, not all over the cabinet. Do you think that will work? Like just in the areas that have creases or molding of some type. Do I need to put a protected coating over glaze after it dries? I am also working on an old antique desk. The old varnish was so cracked I had to strip it all down to raw wood. I will be staining parts of it and painting parts. My question is do I need to put a primer on the area that I will be painting before painting? The wood is very dark even thought I stripped it. Thank you for your help.
Veronika Schroll
Tuesday 24th of September 2024
Thankyou so much for all the explaining. I'am writing you from Germany although I am a Dutch lass.I'am moving house soon so there will be lot to paint over or change .
How to Make a Ceramic Bust Look Antique – Super Naturale
Tuesday 17th of October 2023
[…] level of authenticity. It adds depth, character, and a weathered appearance. The application of antique glaze brings out the nuances of your antique paint colors, creating a mesmerizing visual texture that […]
Sunny Crouch
Saturday 7th of October 2023
That was the best info ever!!! Bless you honey:) I'm currently refinishing my parents 1955 french provincial bedroom set for my grandchildren. I'll be using the recommended products & techniques. I have a tip for you- Need a custom color wax? I've had great success mixing in a dab of acrylic or latex paint into clear wax, gently integrating it into the wax and applying for the desired color. :) Thanks again!
Melanie Alexander
Monday 9th of October 2023
Thank you Sunny! That's a great tip. I hope your makeover turns out fantastic!
Kim Jones
Sunday 26th of March 2023
Amazing and very informative!!